Check this option to enable the plugin functionality for the WooCommerce store.
Enable this option to display the pre calculated price of the product.
Our plugin detect customer’s country using 3 ways
Enable Price By Country plugin’s functionality for the logged in users only.
Enter IP addresses to exclude from price by country functionality, you can add multiple IP addresses as comma separated.

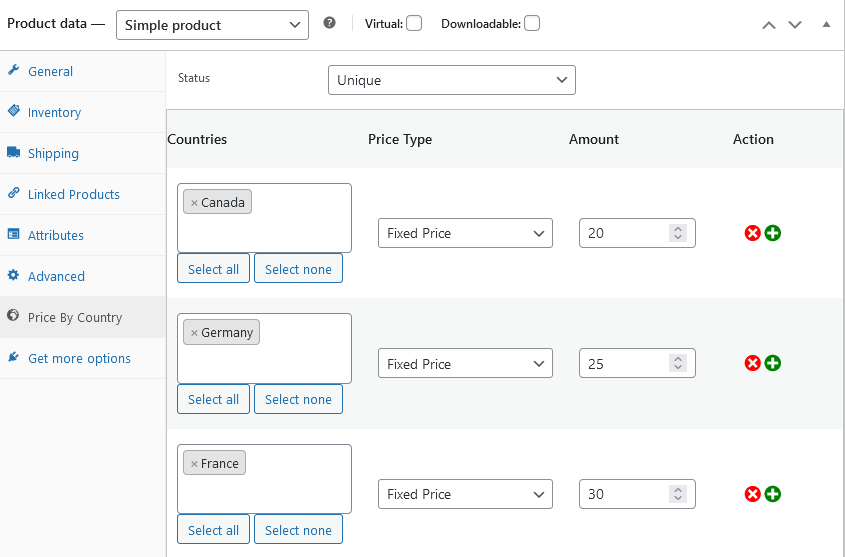
There are 3 ways how to setup the pricing rule sets for the products.
You can add as many rows as you needed and choose as many countries per row as needed. For each row you can specify the pricing type and amount.
Specify amount for the specific row, so that amount will be used as increase/decrease the product price.
You can set up the pricing type in 3 different types. The below options will increase/decrease the product prices for the specified Countries in their respective rows.
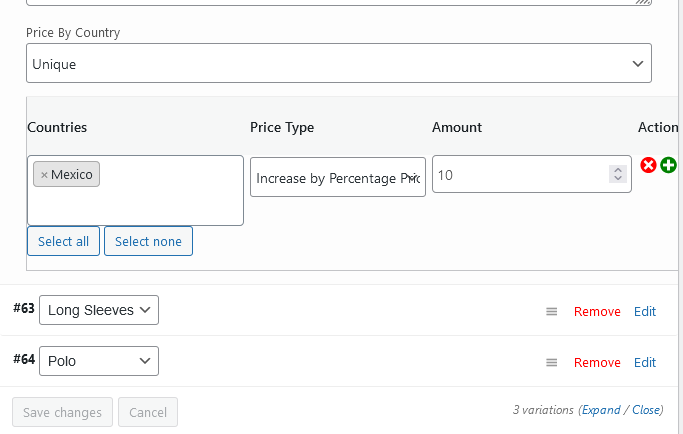
Price by Country plugin supports variable products also and it allow the variations of the variable products to be purchased with specific prices based on the Countries. Here the scenario is still the same as above for the simple products.
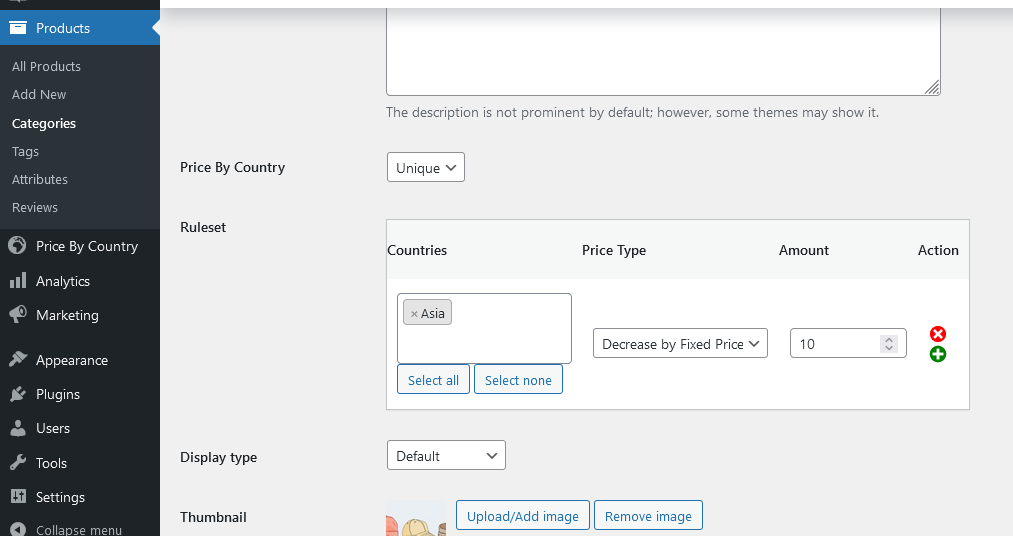
Our plugin allow the store managers to create the pricing rule sets at the category level also to ease their job. If the product level settings is not configured, when our plugin consider it as ‘inherit’ by default and it will look for the category level rules.
Here at the category level the options are still the same as the product level but with a single difference. When inherit selected at the category level also, it will ignore its rule sets and will look for the global rule sets.
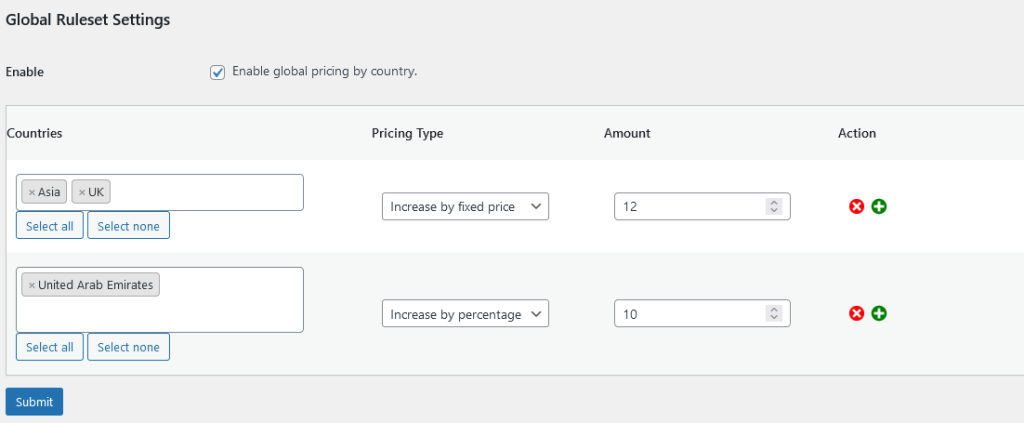
These settings apply for all the products if they are not configured. You just need to enable and set up the rule sets like countries pricing type and amount. These settings will be applied to all products without any conditions.
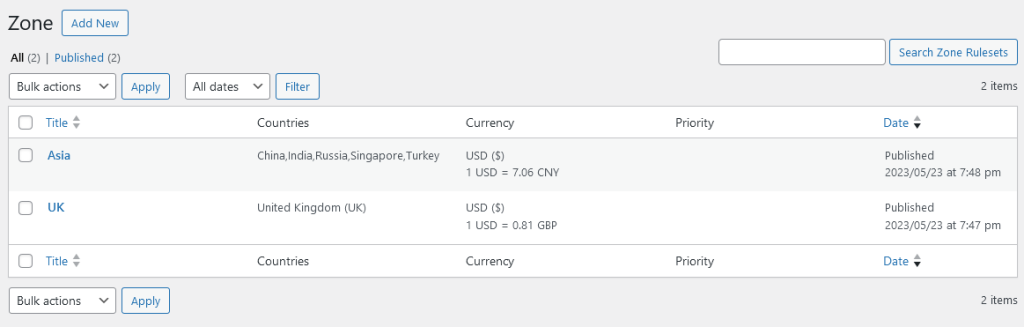
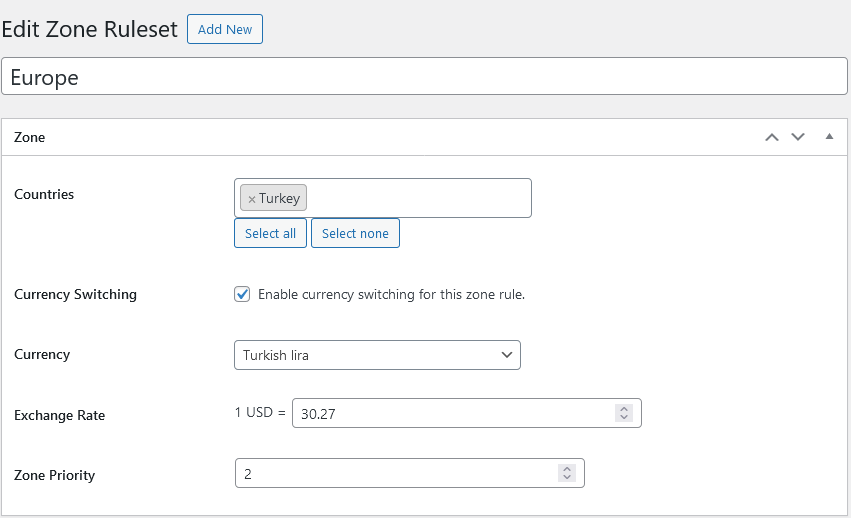
Zones are used for two purposes
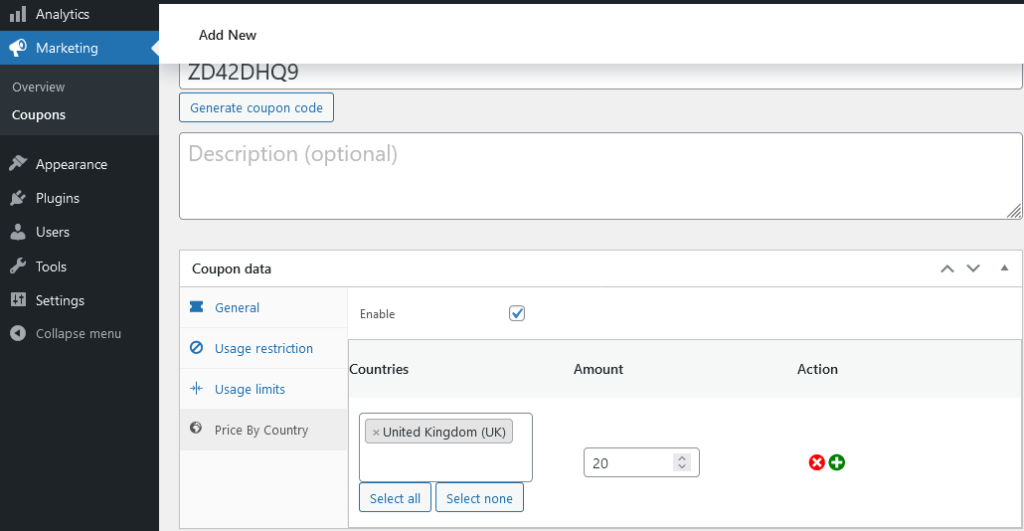
Price by Country allow to override the default coupon amount and add specific coupon amount for specific countries. There is no pricing type like fixed price or percentage because these options are already in the coupon settings and we are using discount type of the coupon default.
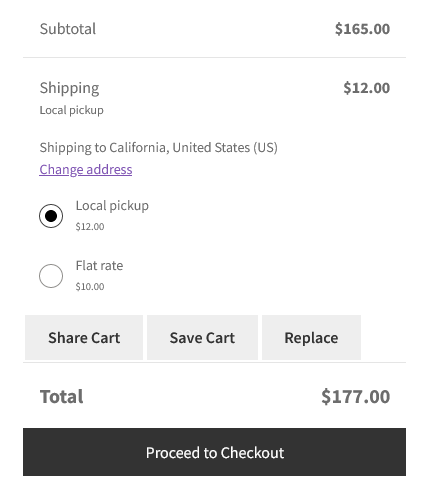
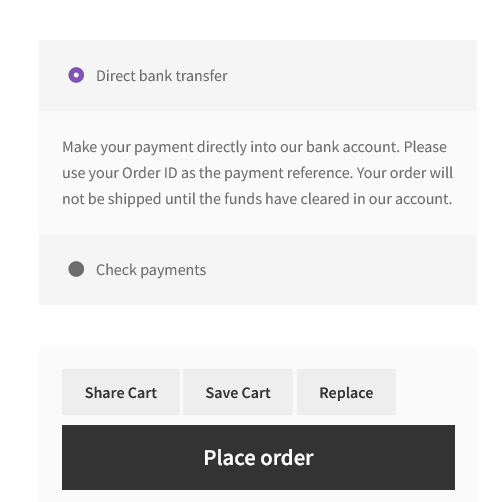
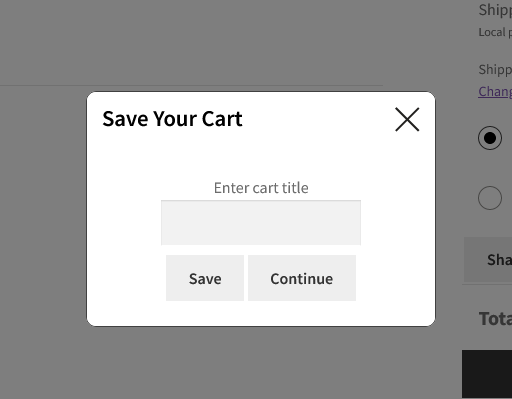
WooCommerce Save and share cart boost your business by save you cart for later use for customers and share with other using social media platforms. Its very comprehensive and feature rich plugin and support numerous options.

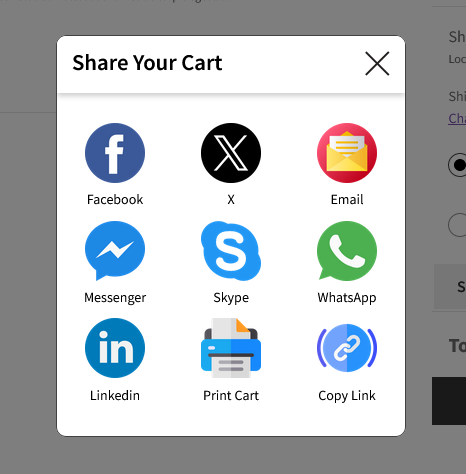
By default Share Cart popup display all possible social media icons, print cart and copy link options, but they can be disabled using these settings.

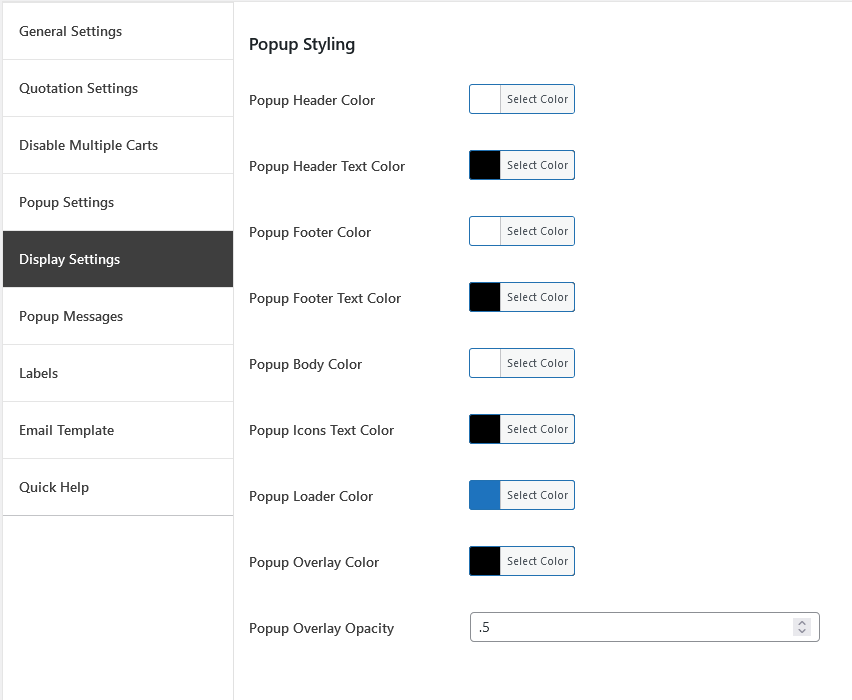
Save and share cart popup can be customize using several color combinations. Below are some of the color options. Also specify the opacity of the popup outer area.
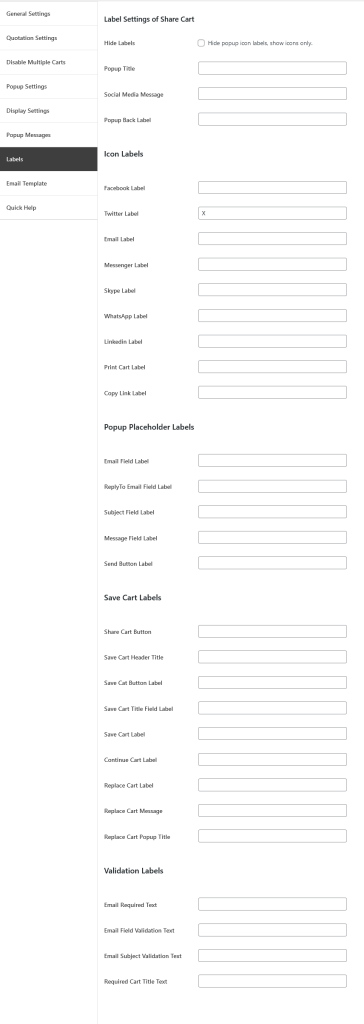
All strings belongs to save and share cart are localized and dynamic. From the Labels menu all labels options available.
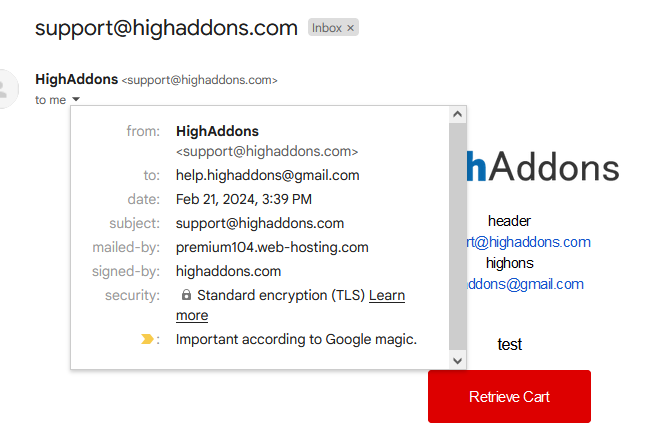
Share cart comes with a very fancy and customizable email template.
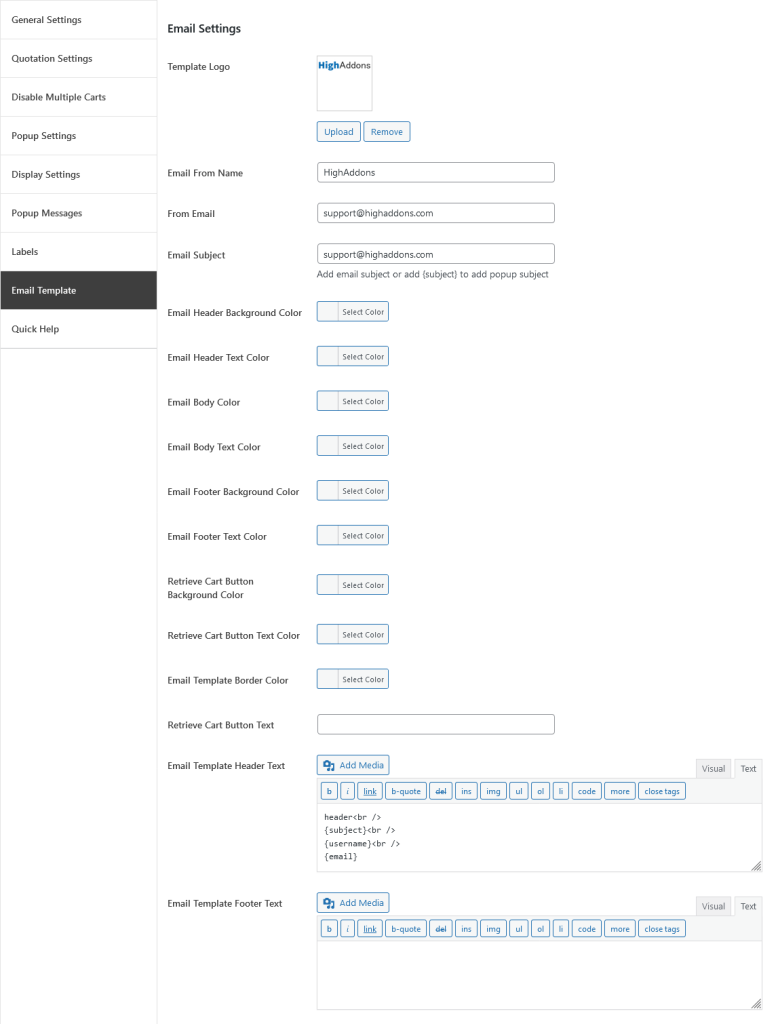
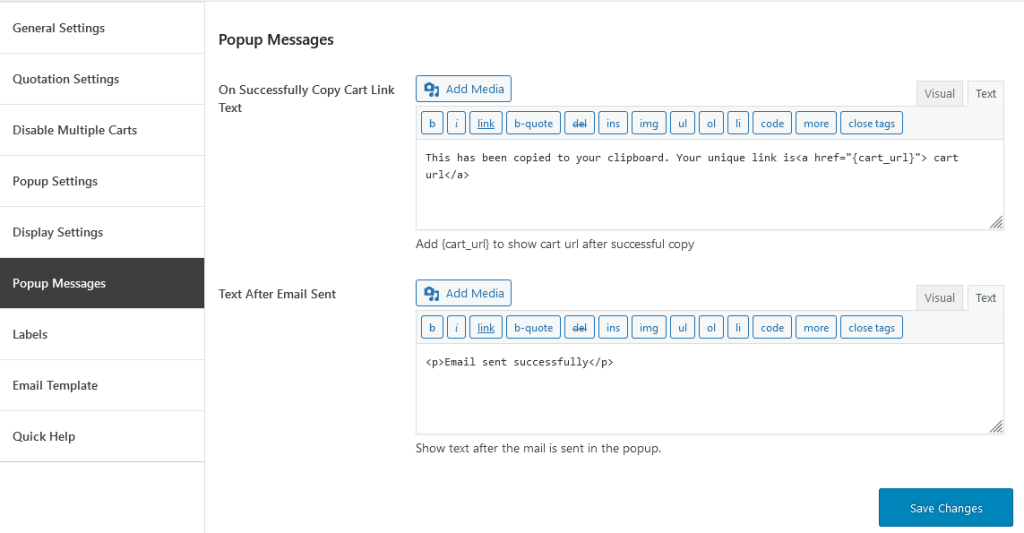
{cart_url}: Add {cart_url} in “On Successfully Copy Cart Link Text”, “Email Template” and “Content After Cart” editors to show url that will be used to retrieve your saved cart.
{subject}: Add {subject} in Email Subject of Email settings to set email subject given on front end popup.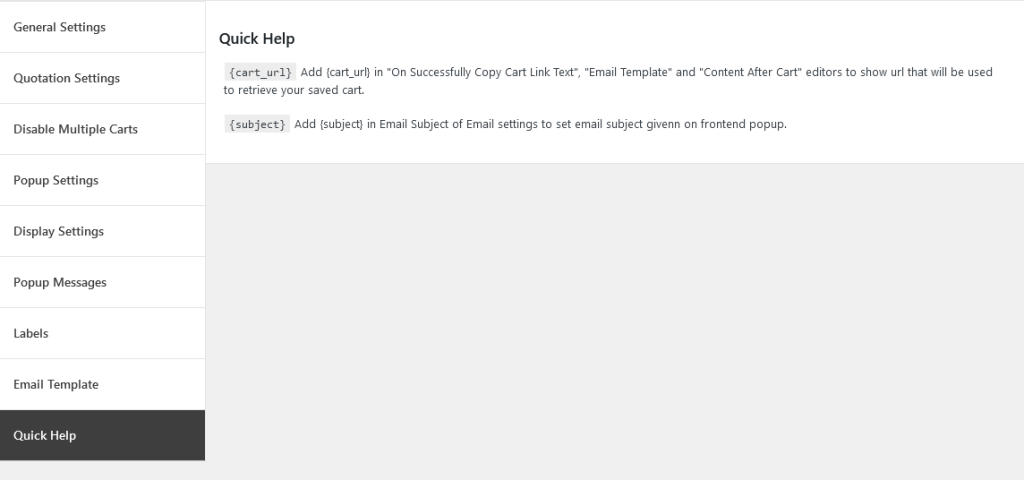

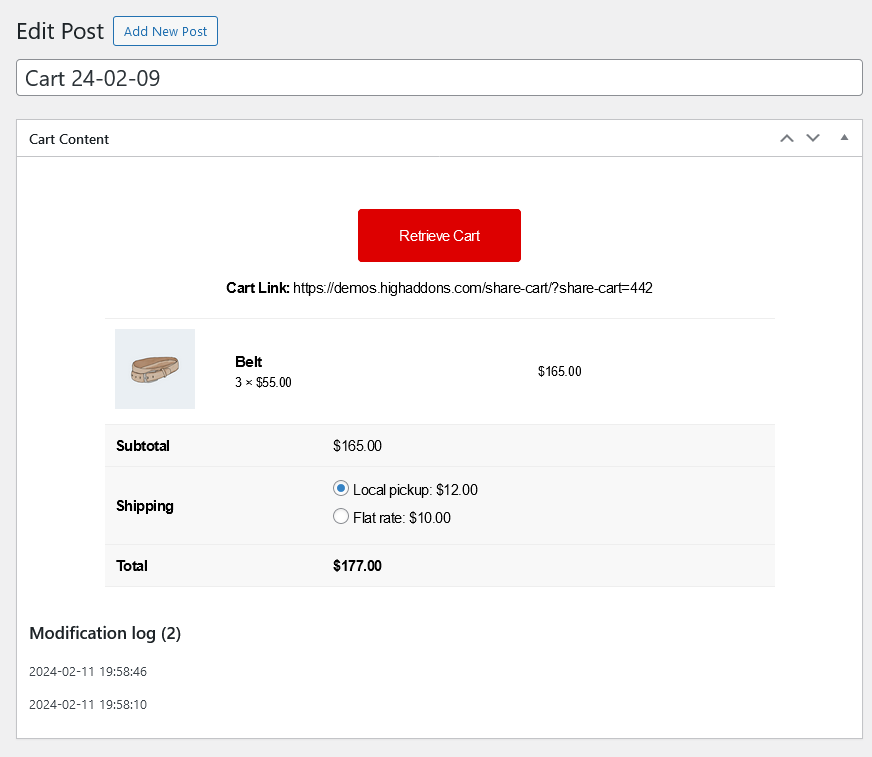
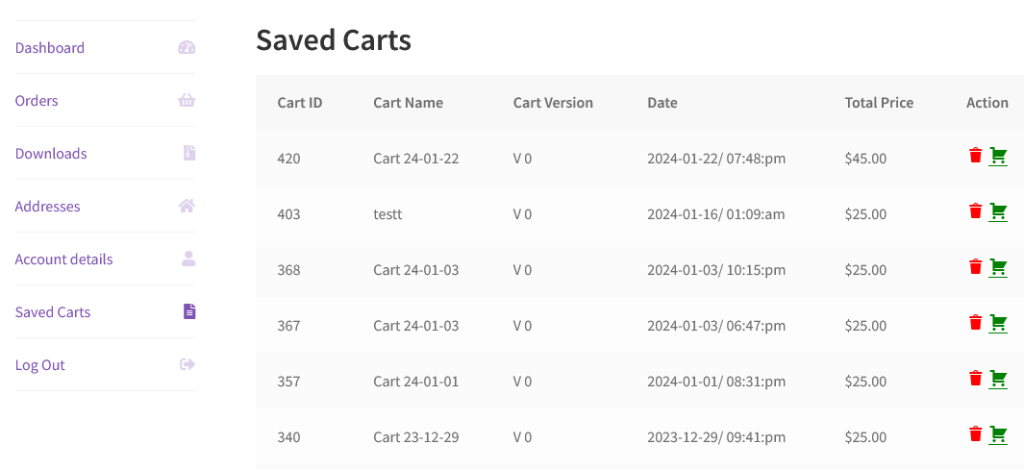
List of all saved carts by the customers.

We save the carts in custom post. It contain the retrieve cart button, displaying the cart URL and the saved cart content. Also we displayed the modification log which identify the changes date in the current cart.
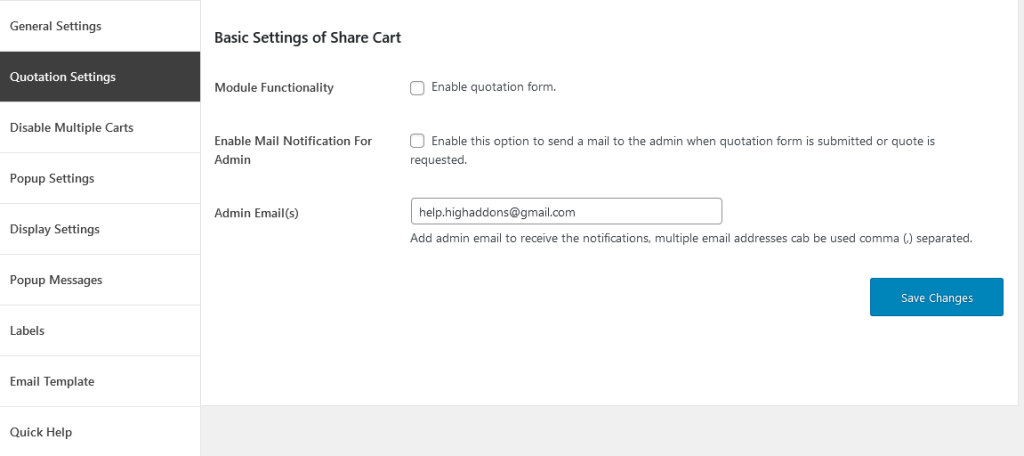
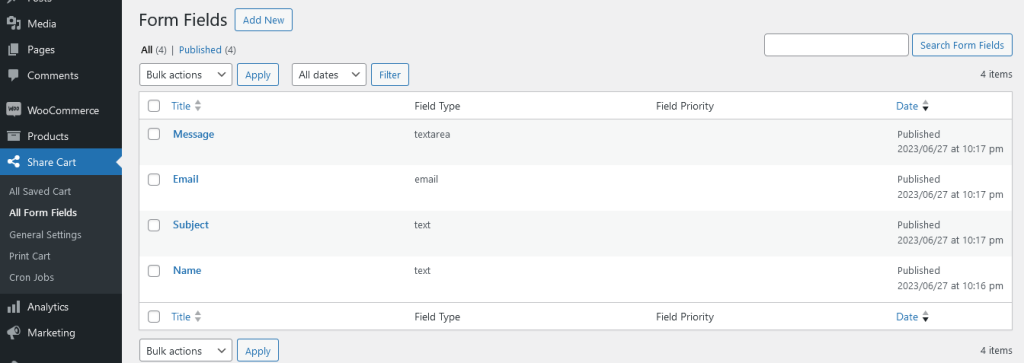
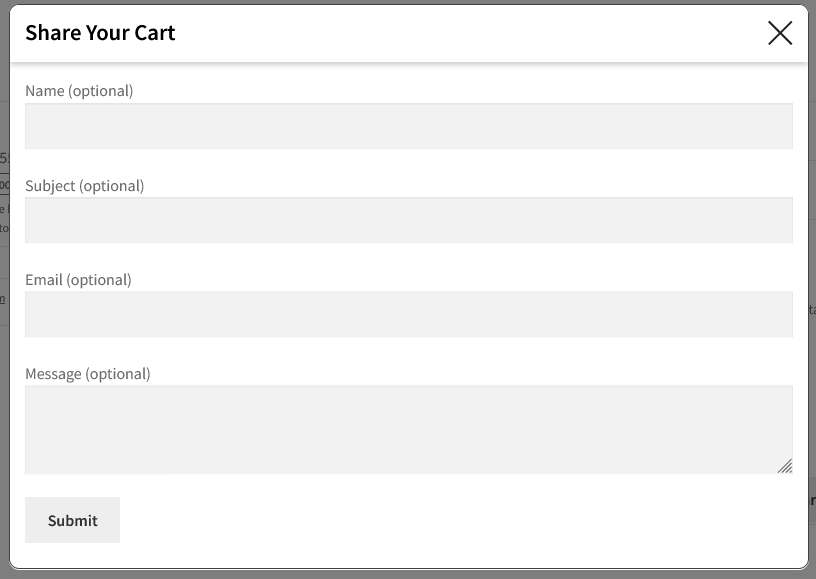
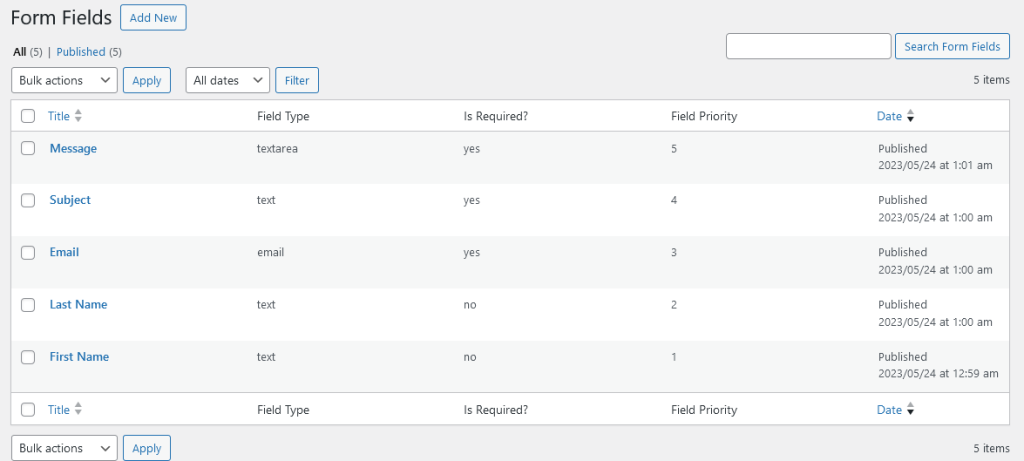
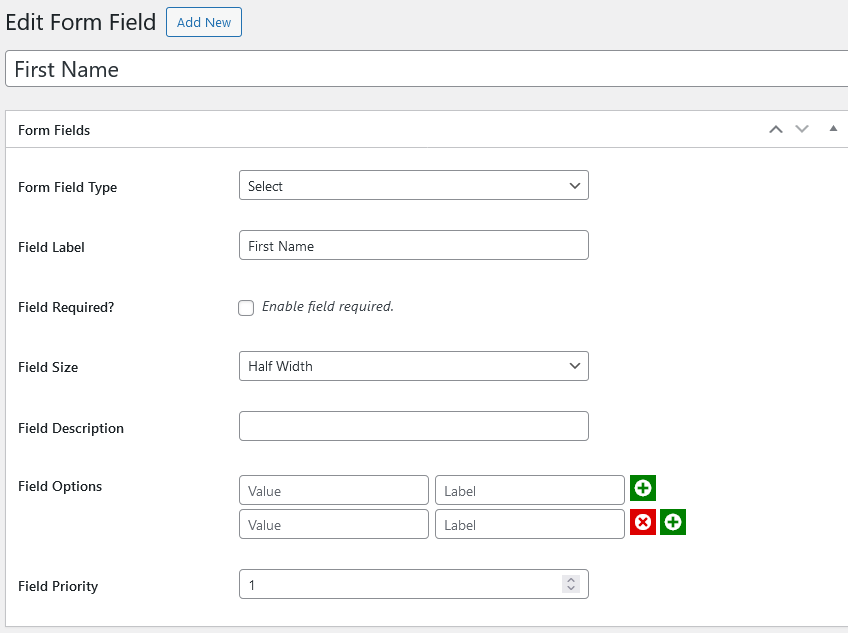
As discussed above if the quotation form is enabled the share cart popup will display the quotation form instead of social media icons. The quotation form fields are dynamic and here is the list of them.


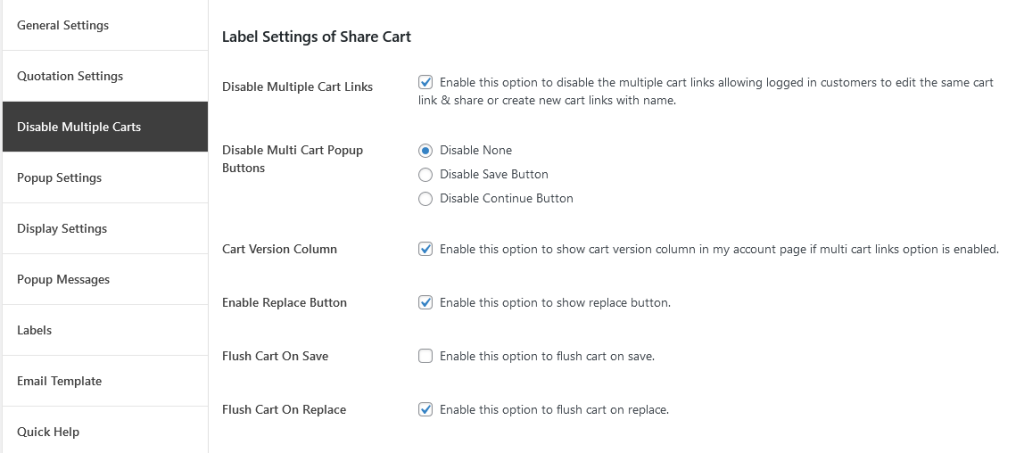
Below is the list of saved carts of the current user in my account page. We added a new endpoint to my account tabs and displayed all saved carts of the customers with the information. Here is a column named “Cart Version” this identify the cart version, if someone retrieve the cart using URL and modify the cart and replace it the version will be changed. Also the cart can be deleted and retrieve here.
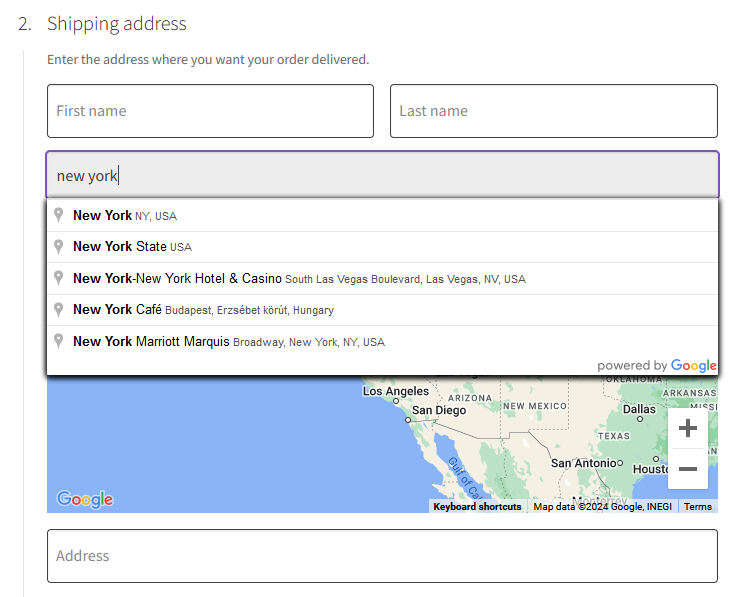
Google Address Autocomplete plugin allow the customer to autofill the checkout address fields of billing and shipping using Google places API. It supports the checkout blocks also.
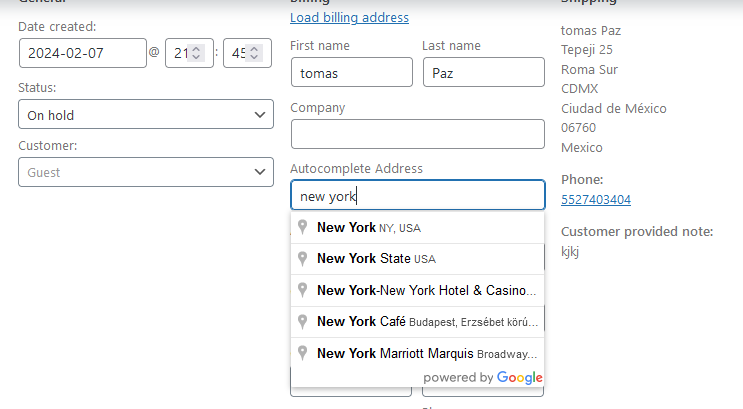
The first 4 options are used to enable the autocomplete functionality for the checkout billing and checkout shipping forms. Similarly enable autocomplete functionality for the billing and shipping forms also but this time for WooCommerce my account page.
Google Autocomplete API: Get you Google API key here.
Select Countries To Restrict Auto Complete Address: This option restrict the selected countries from the autocomplete search and they will not appear in the google search.
Billing/Shipping Form Field Label: Our plugin allow to add separate field for the autocomplete, so the label of the field can be change here.
Show Combined Address 1 & Address 2: This option will combine the address 1 and address 2 and put that combined address in the address 1 field.
Disable Separate Field: This option is used to disable the separate field used for the autocomplete.
Street Address Pattern: For some countries the address pattern is different. In the address field our plugin put the street number first then street name, but for some countries this pattern can be reverse. Below option is used to select specific countries for this specific option.

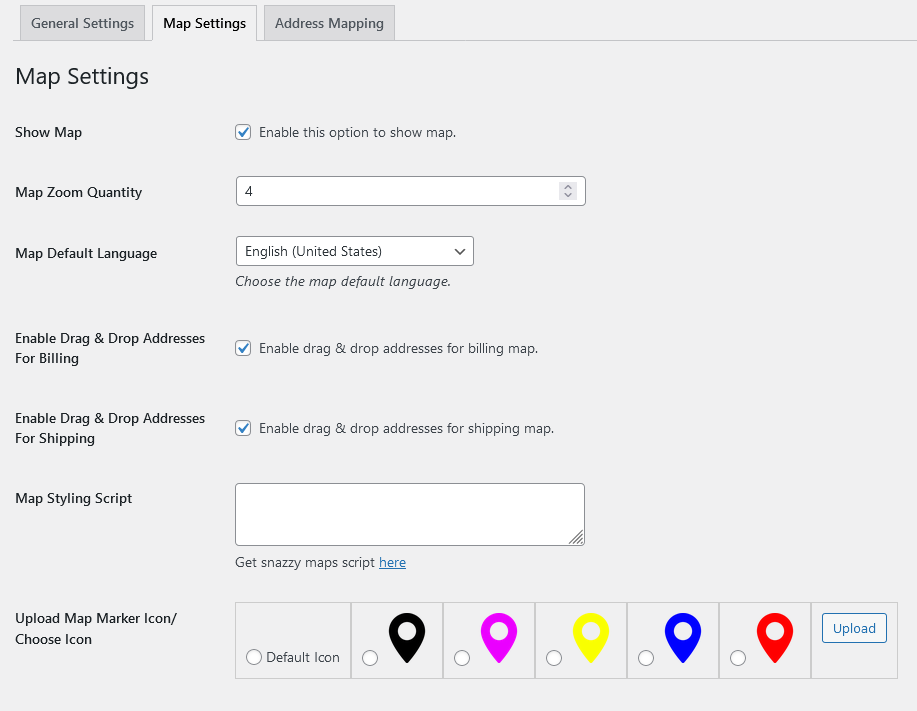
Map is attractive way to display location of the currently selected address. Map is used to generate the address without using the autocomplete field by dragging the marker. Below are some of the options:
Show Map: This option enable the map for the billing and shipping fields.
Map Zoom Quantity: Here the map zoom quantity is specified.
Map Default Language: Choose desired language for the map.
Enable Drag & Drop Addresses: These options are use to enable the drag and drop of the map’s marker to the desire location for the autocomplete fields of billing and shipping.
Map Styling Script: Google Address Autocomplete plugin allow to design the map also using snazzy maps.
Upload Map Marker Icon/Choose Icon: Choose existing or upload the desired marker for the google map.
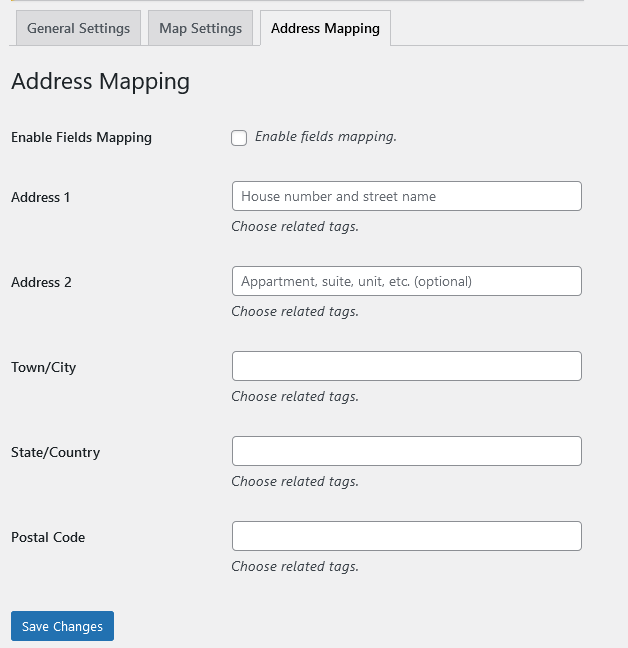
Address mapping is used to modify the pattern of the address generated by the google autocomplete. By default we display the street address following by the street name. So the address mapping allow the admin to setup the format for the address 1, address 2 , city, state and postcode fields. Also we ignore some of the tags and do not display all the data returned from the google places so using predefined tags every piece of data returned by google place is available to be used. Some of the tags are mentioned below. But before using these tags we need to enable the address mapping functionality.
Tags for Address1 and Address 2: {plus_code},{neighborhood},{street_number},{route},{sublocality_level_2},{sublocality_level_1},{sublocality},{subpremise},{name},
Town/City: {sublocality_level_2},{sublocality_level_1},{sublocality},{locality},
State/Country: {administrative_area_level_4},{administrative_area_level_2},{administrative_area_level_2},{administrative_area_level_1},
Postal Code: {postal_code_suffix},{postal_code},
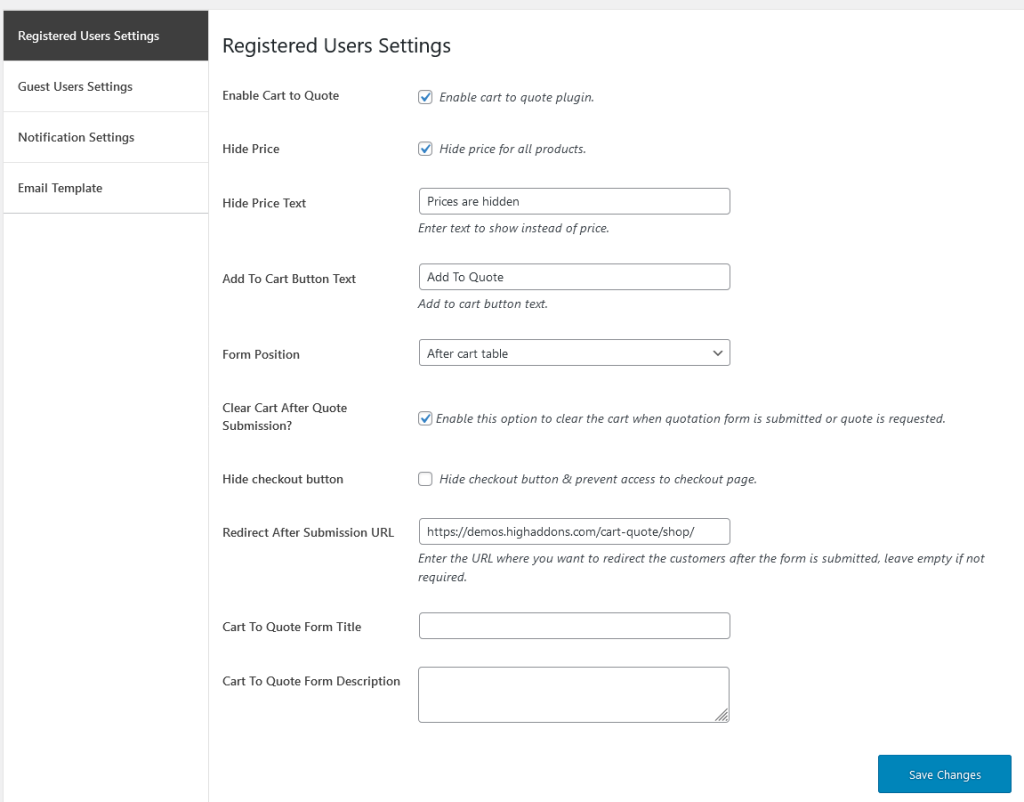
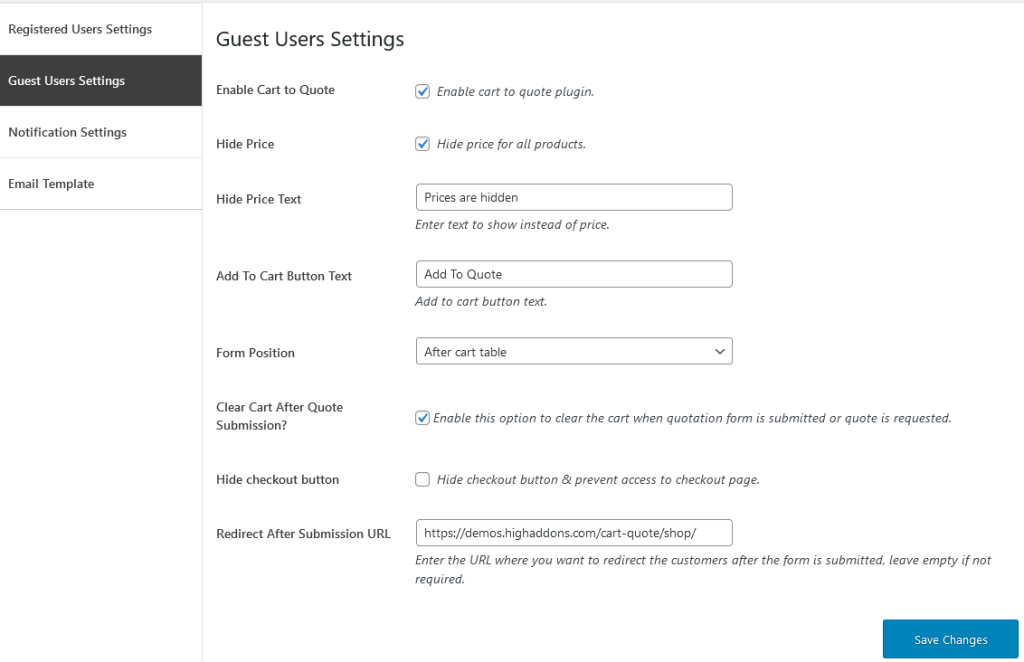
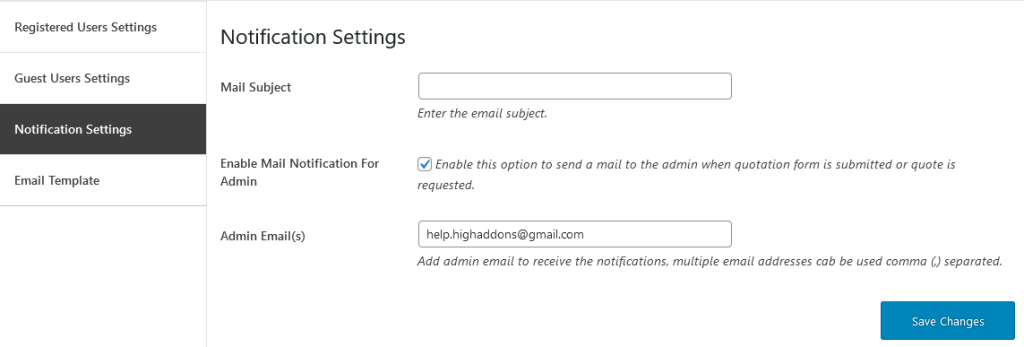
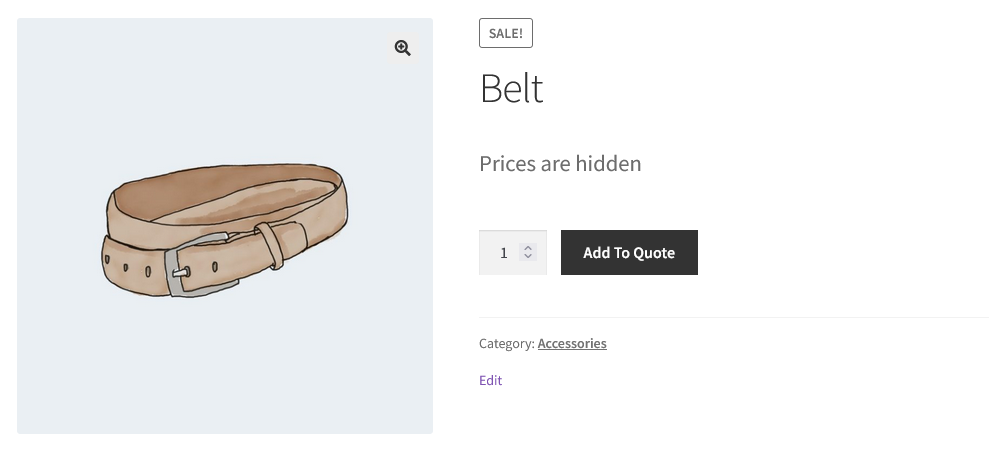
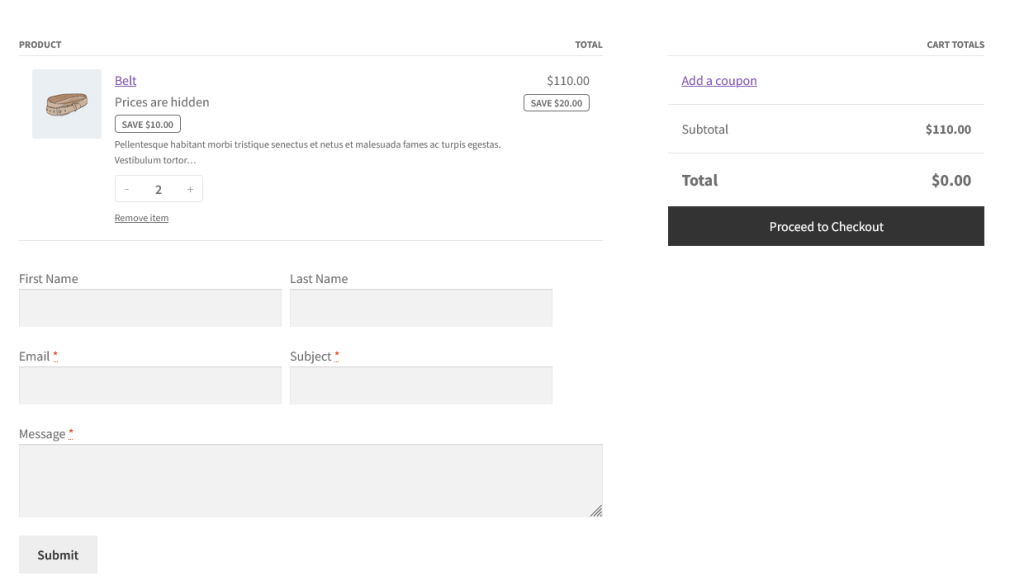
Cart to quote allow the customers to add to cart the products as usual and does not add any restrictions on cart functionality but instead of proceeding directly to checkout and making a purchase, they have the option to request a quote for the items in their cart. Cart to quote allow the customers to ask the queries about cart products using quotation form. Cart to quote comes with a form with a dynamic fields.Cart to quote is also compatible with WooCommerce cart block page. Below are the option of the plugin in details.
All the settings are the same as above but these settings are used only for the guest users. Guest users are those who are log logged in to the store.
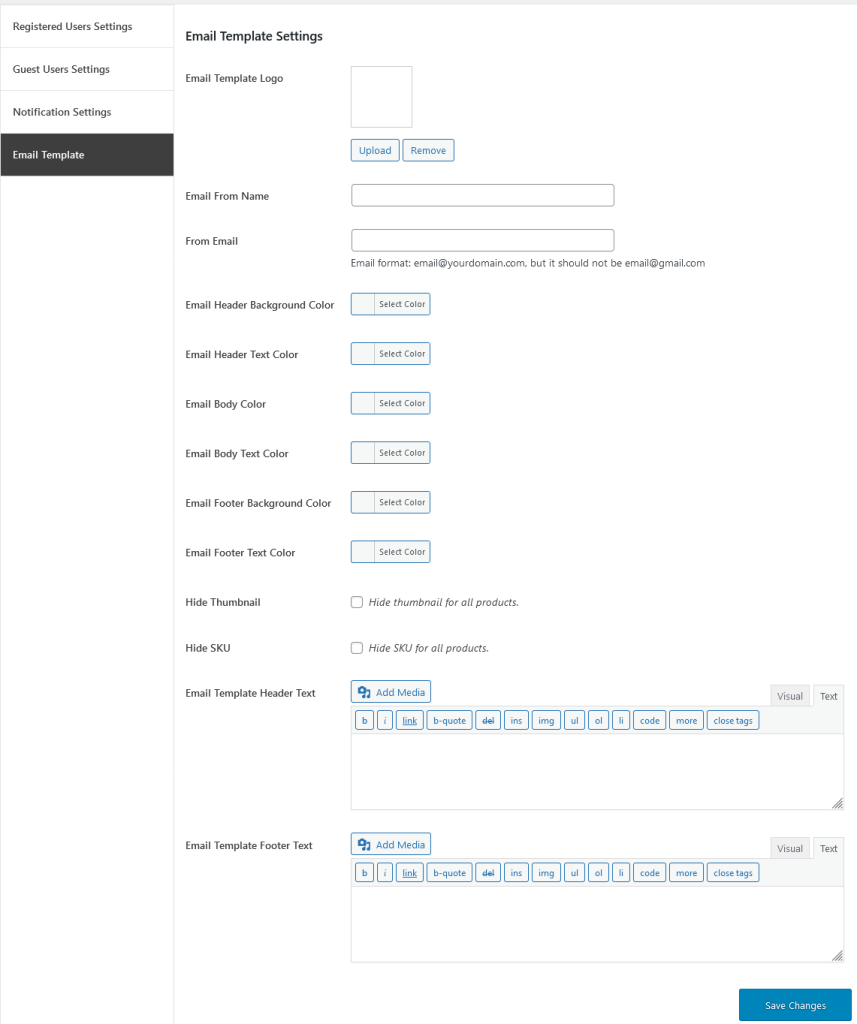
Cart to quote comes with a very fancy and customizable email template.

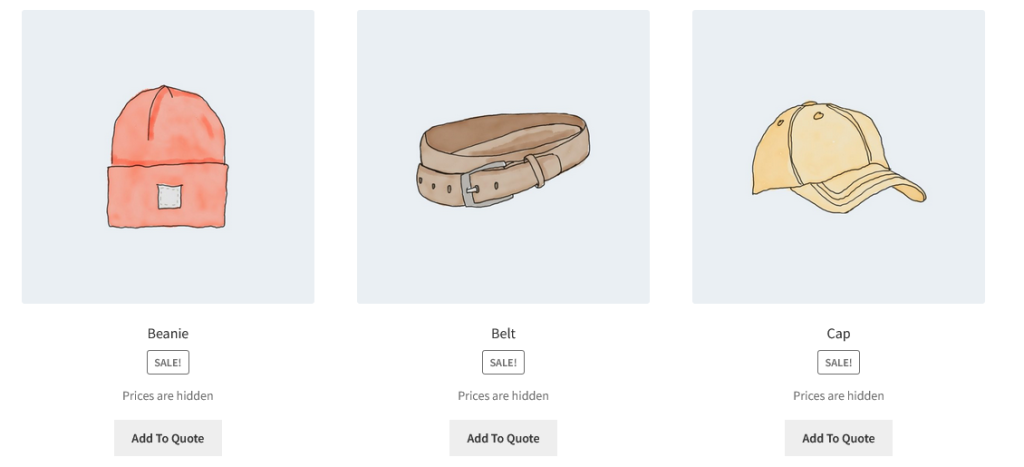
All the items has a changed label of add to quote instead of add to cart. Also prices are hidden and some dynamic text is displayed.
We are displaying our quotation form in WooCommerce block cart.
Cart to quote form fields are dynamic and they can be add/removed. Some of them are listed below.
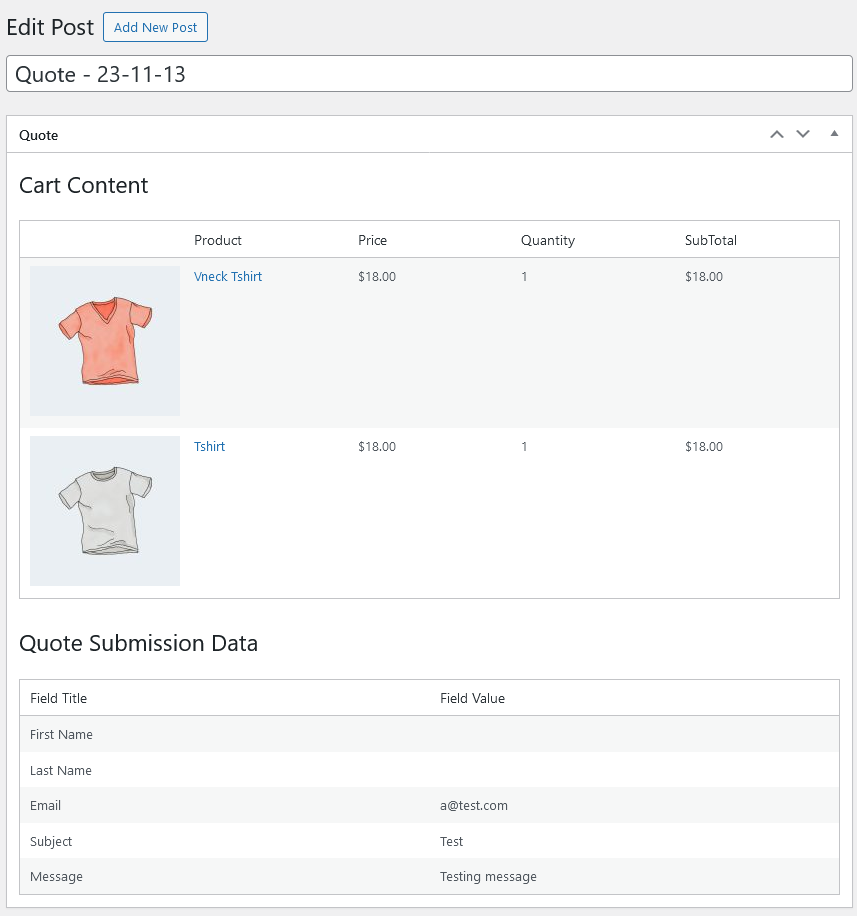
Quote consist of cart content along with submitted quote form data.
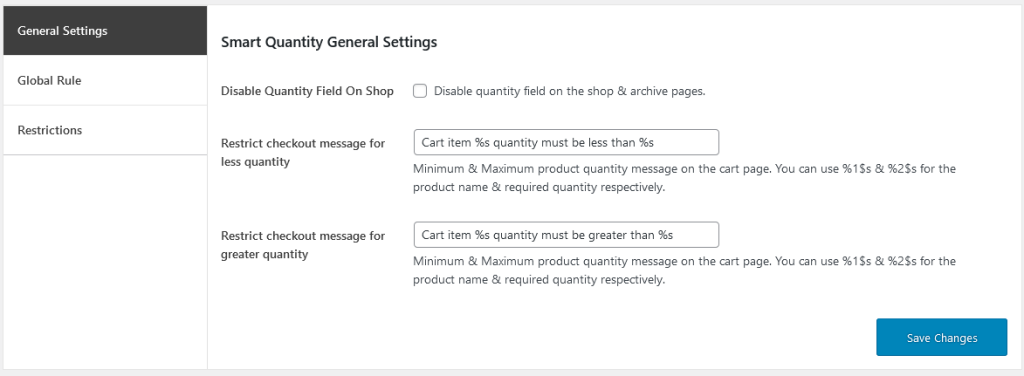
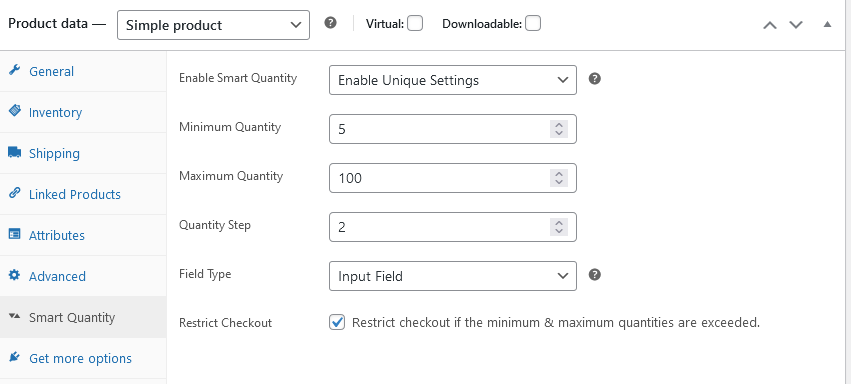
Smart product quantity allow to sells the products with quantity restrictions and sell the products with the decimal quantities. It restrict the product to be purchased within range of quantities, which help in selling different kind of products. It enables to add the product to cart with desire quantity on shop and archive pages also. It also restrict the checkout if any item of cart does not meet the quantity range.
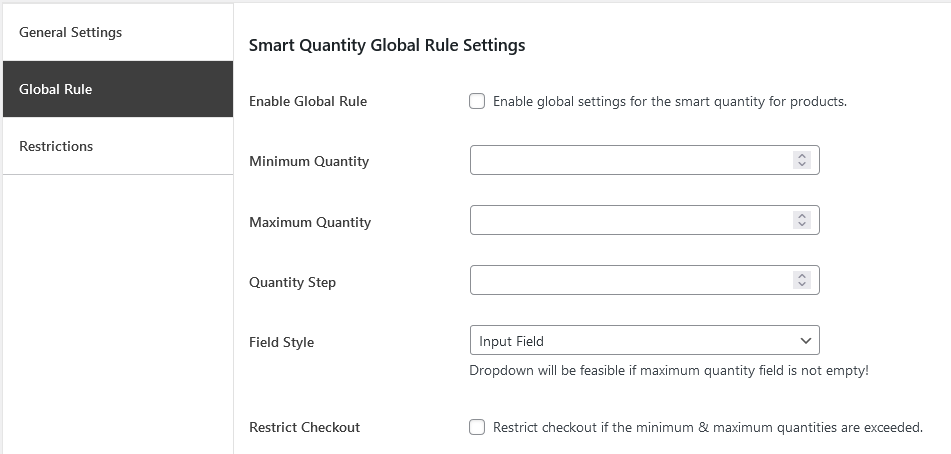
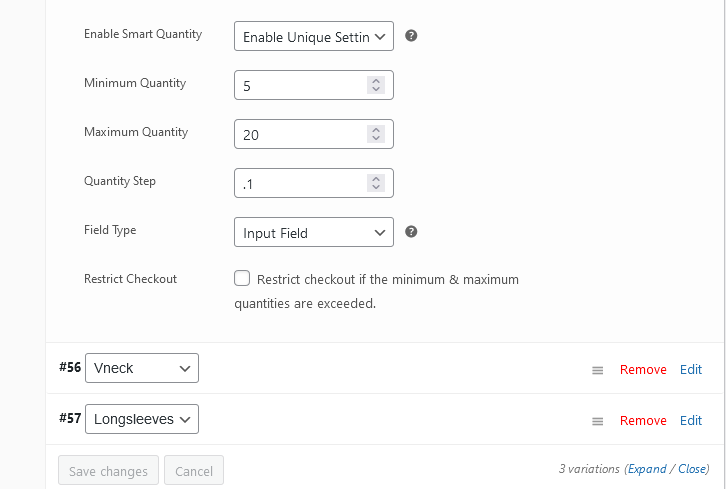
Enable smart quantity functionality on all products of the store from the general rule sets. These settings will apply on all products if product or categories are not configured.

Status: There are 3 ways how to setup the pricing rule sets for the products.
Smart product quantity support also the variations of the variable products with the same rule sets as mentioned above.
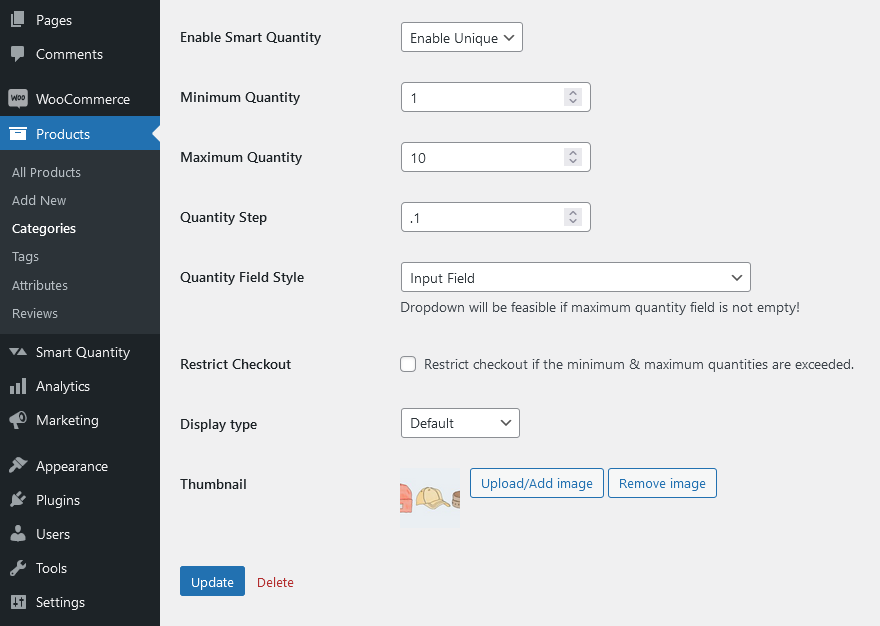
Our plugin allow the store managers to create the smart product quantity rule sets at the category level also to ease their job. If the product level settings is not configured, when our plugin consider it as ‘inherit’ by default and it will look for the category level rules.
Here at the category level the options are still the same as the product level but with a single difference. When inherit selected at the category level also, it will ignore its rule sets and will look for the global rule sets.
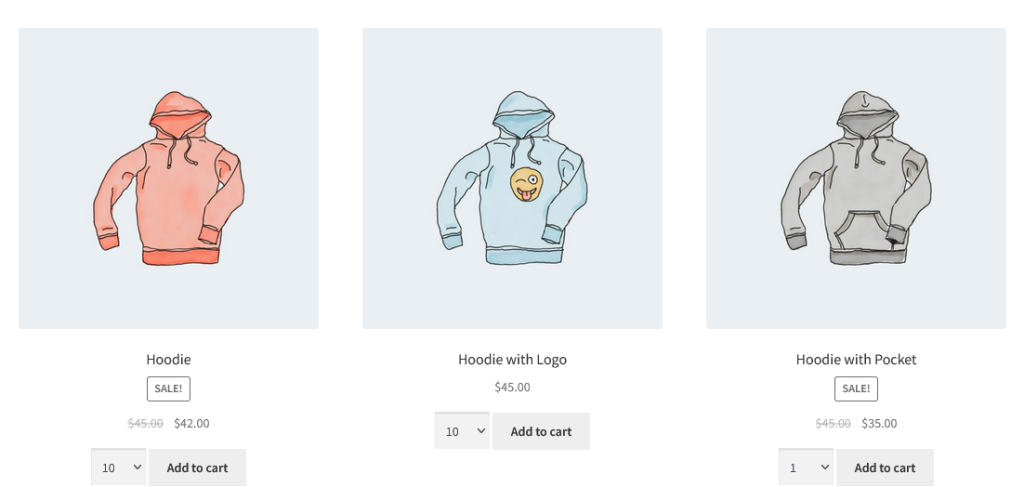
Shop page with quantity fields enabled.
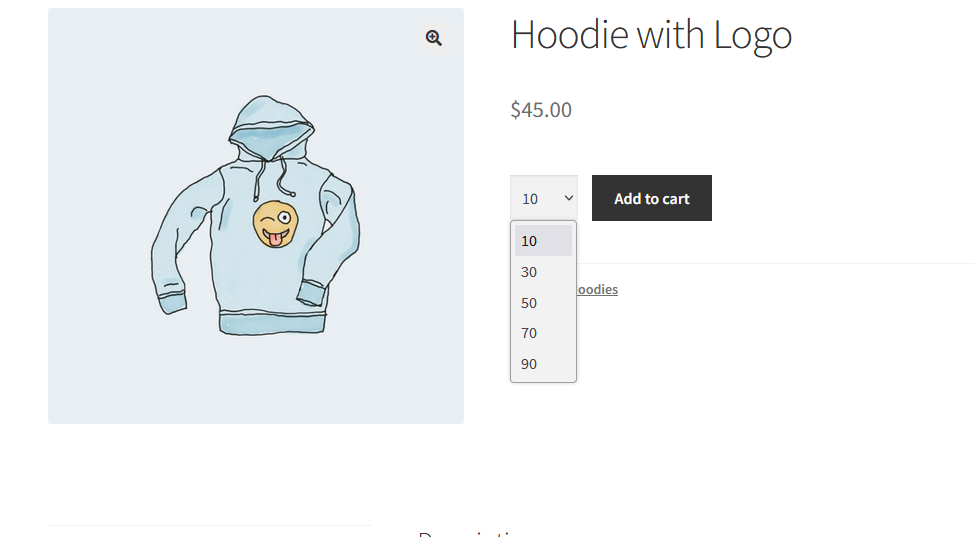
Variable product page with variation selected.

Simple product page with dropdown type quantity field.
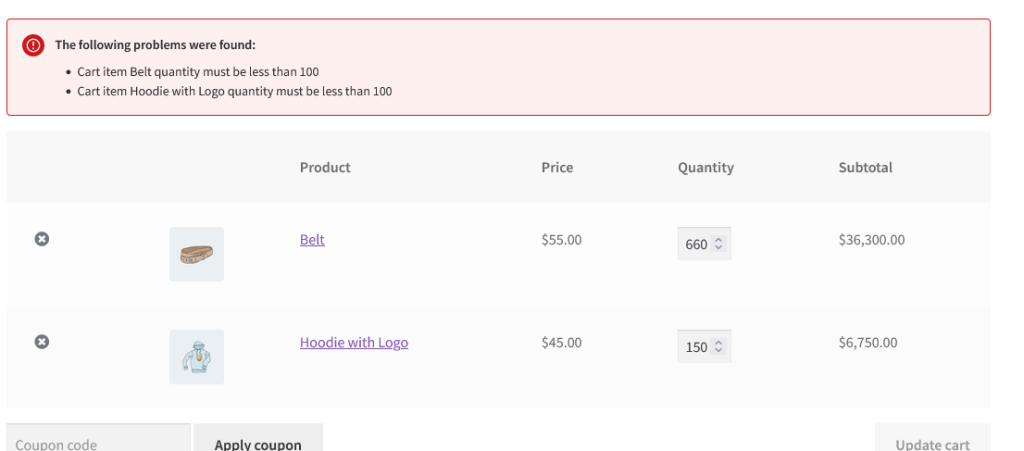
Cart page with warning message because some products exceeds the limit of quantity range.
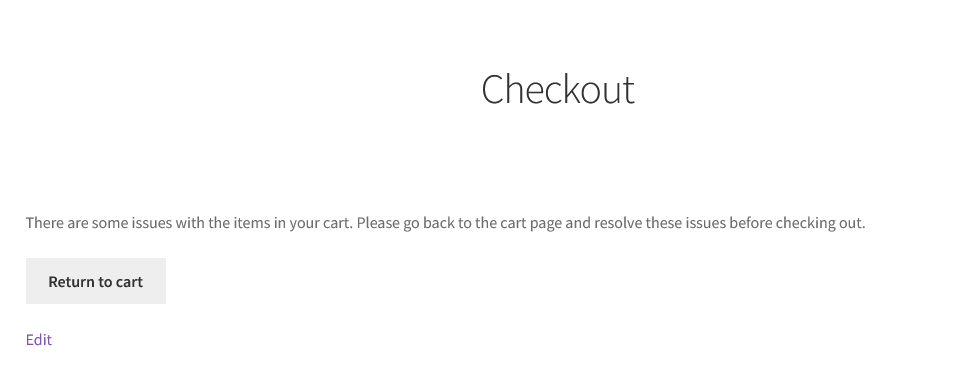
Checkout page is restricted because some of the products exceed their quantity limit and also checkout restriction is enabled.
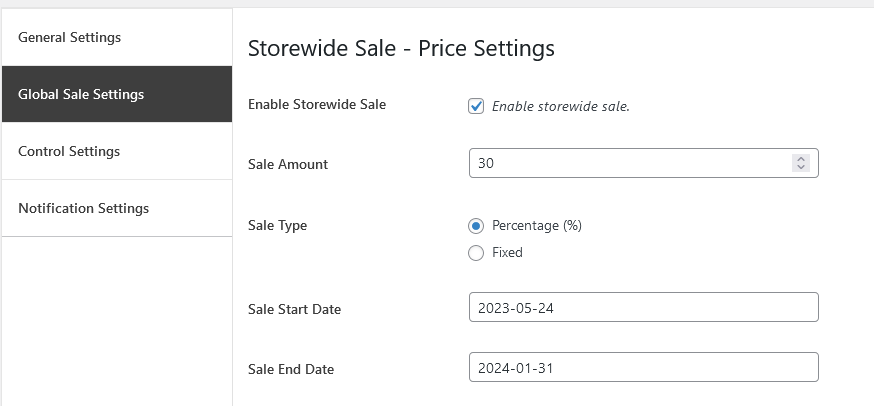
WooCommerce stores comes with the hundred and thousand of the products but its hard to apply sales for each products manually. Its essential to offer sales on specific occasion which is time consuming to do it multiple times manually. Storewide sales plugin comes with the solution, it allow to add sales prices for specific categories at once. It also comes with the sale bar to display the description about the sale.
WooCommerce Storewide sale plugin has different methods to apply sales for the products
Enable this option to override sale flash with your custom sale flash. So that you can design it and change the text inside.
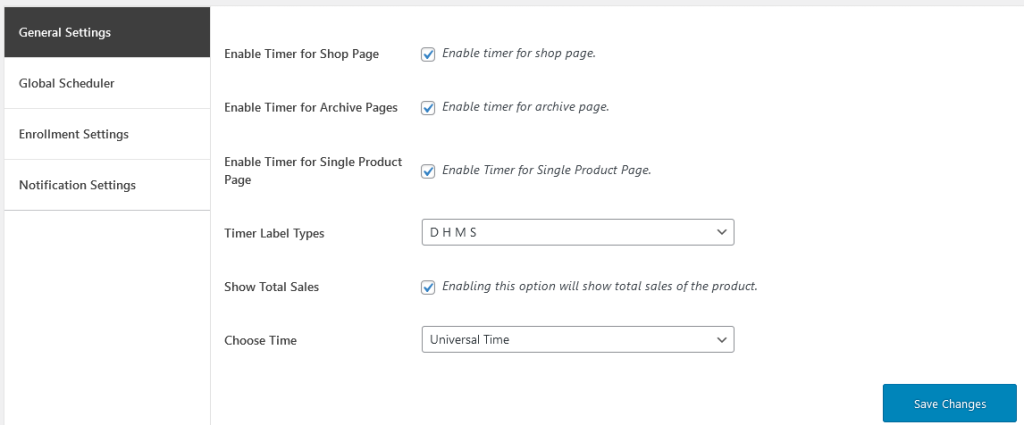
This option is used for the start date and end date of sale to start/end up with the local time or universal time.

Storewide sale plugins come with multiple options to enable the sale for the WooCommerce store.
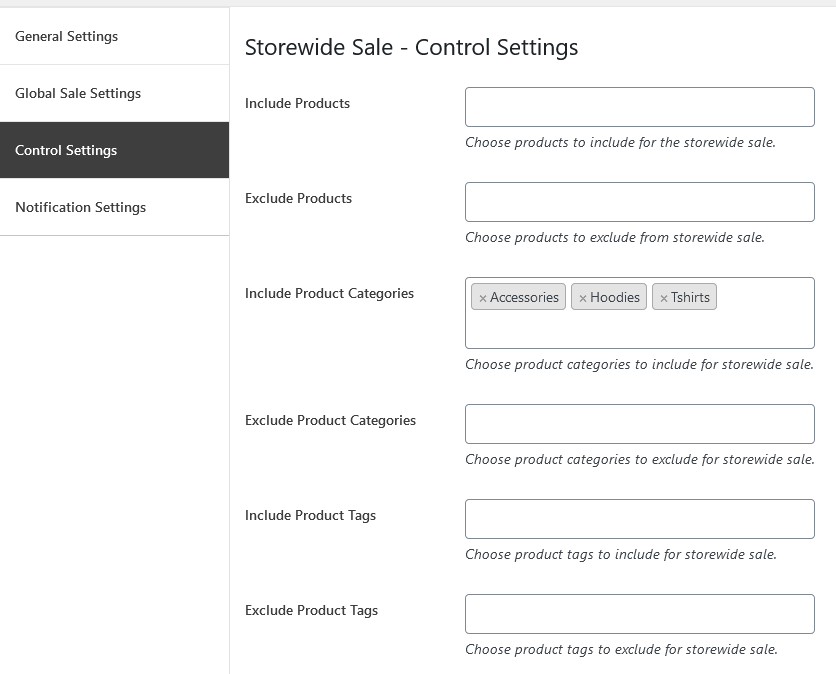
This section is used to identify the products, categories and tags to specify or restrict the sales.
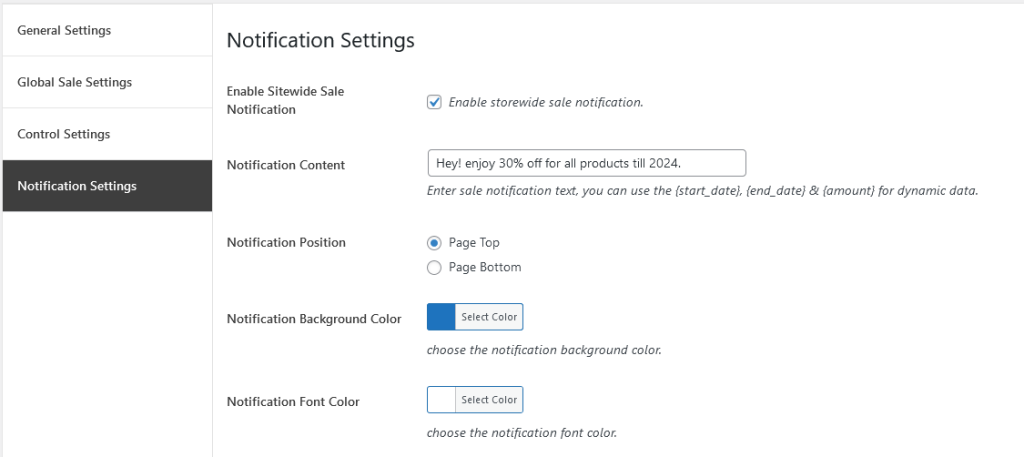
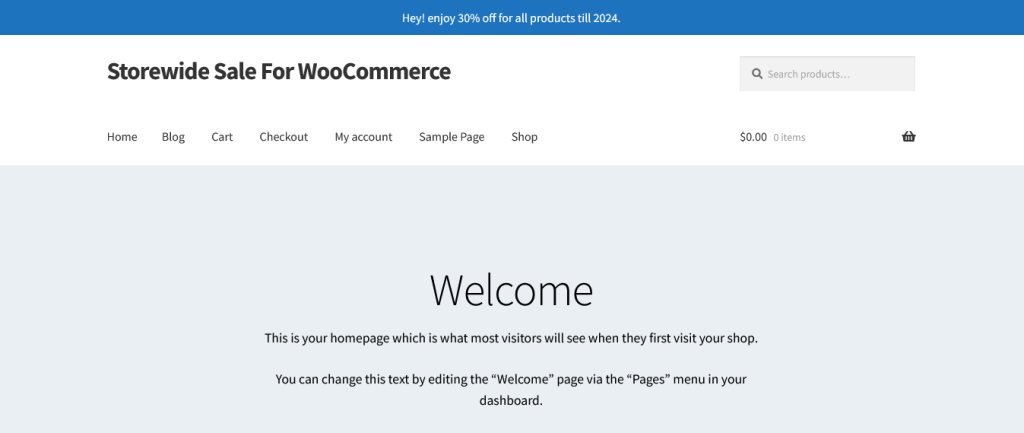
Notification bar will be display on the store pages to attract the customers.
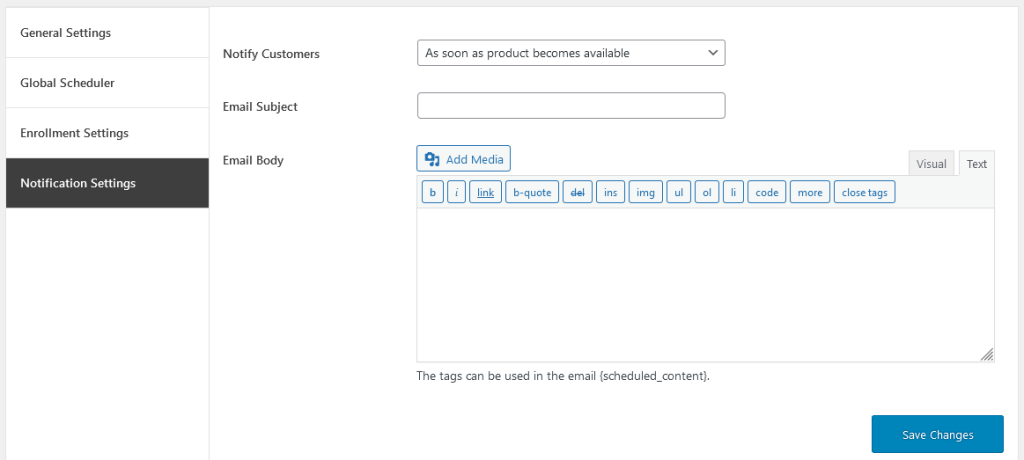
What if we have products but unavailable for a while or we have some products which will not be available after some time? Availability Scheduler For WooCommerce comes with the solution. It allow you to schedule the products for specific time and collect emails for notifications about unavailable products when they are available.
These settings apply for all the products if they are not configured. You just need to enable and set up the rule sets. These settings will be applied to all products without any conditions.
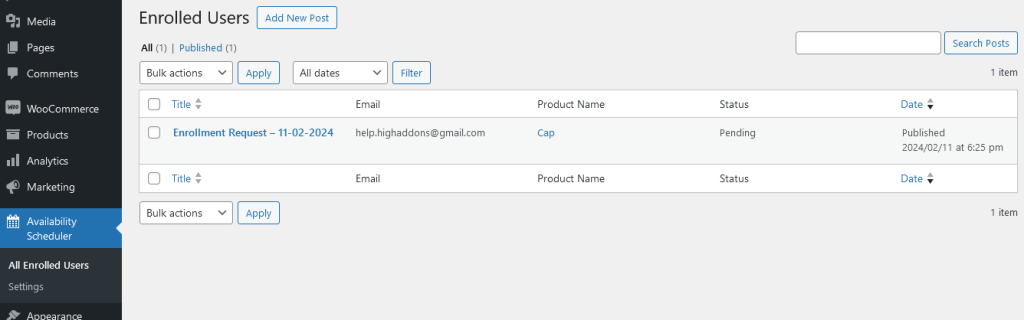
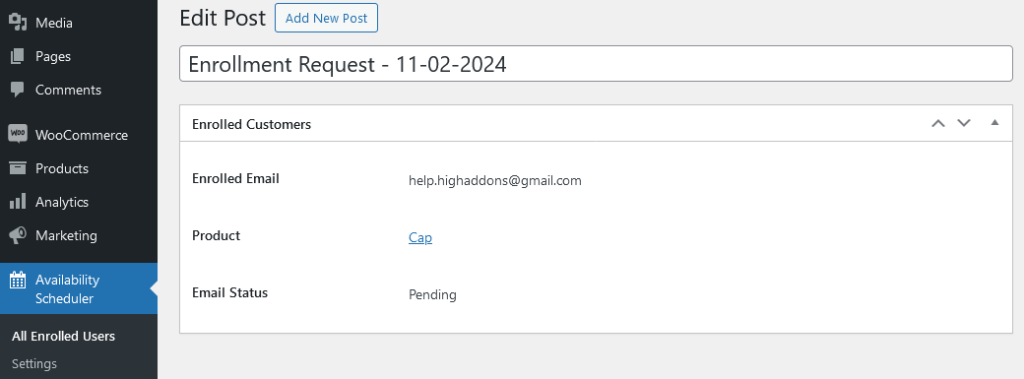
When customer enrolled the custom post added with the email status and product information.
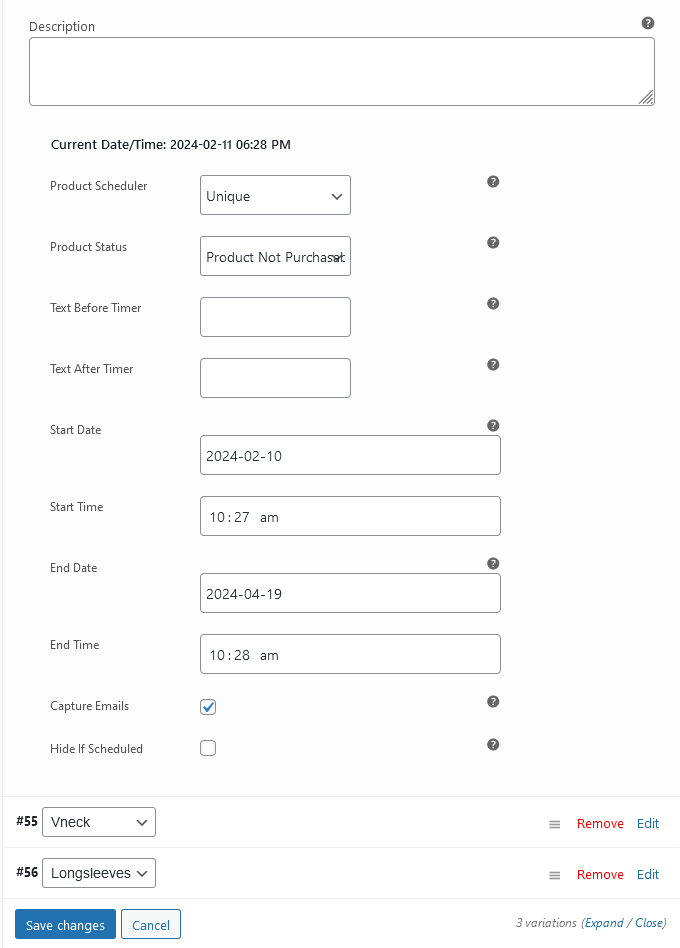
There are 3 ways how to setup the schedule rule sets for the products.
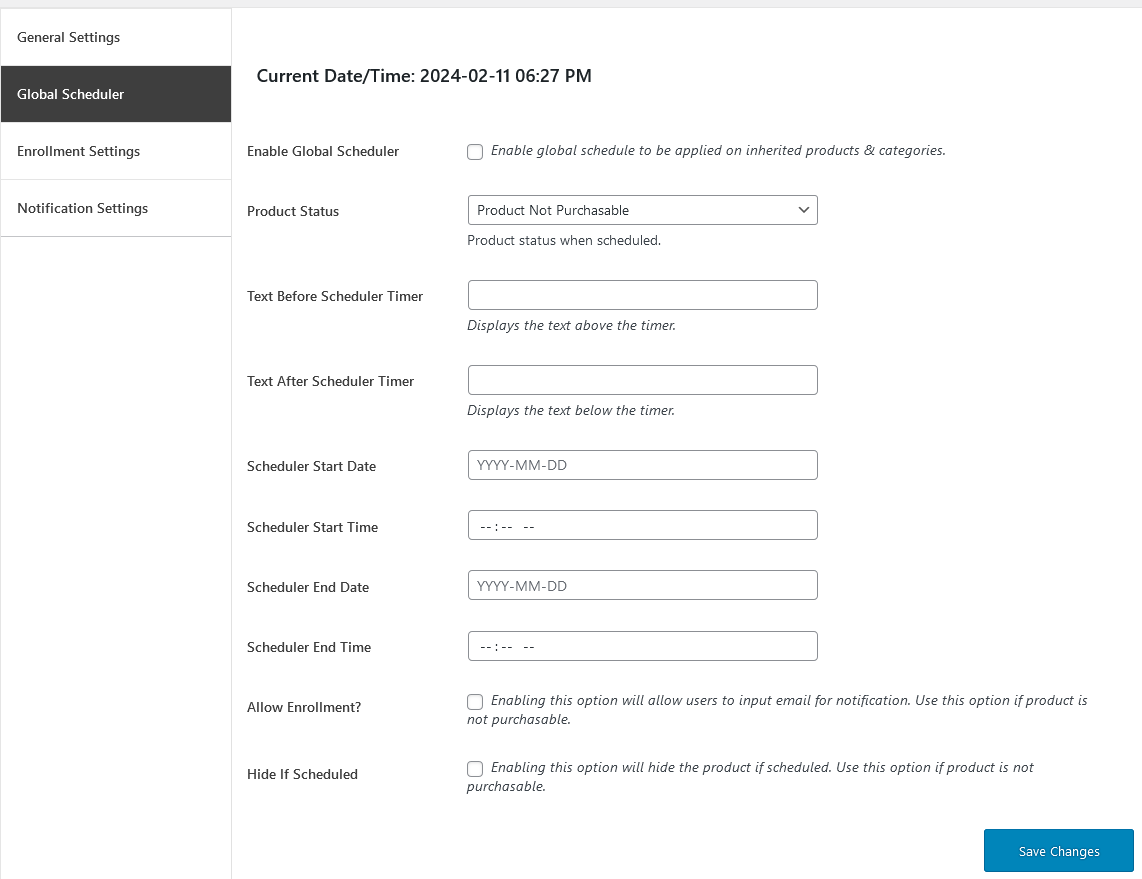
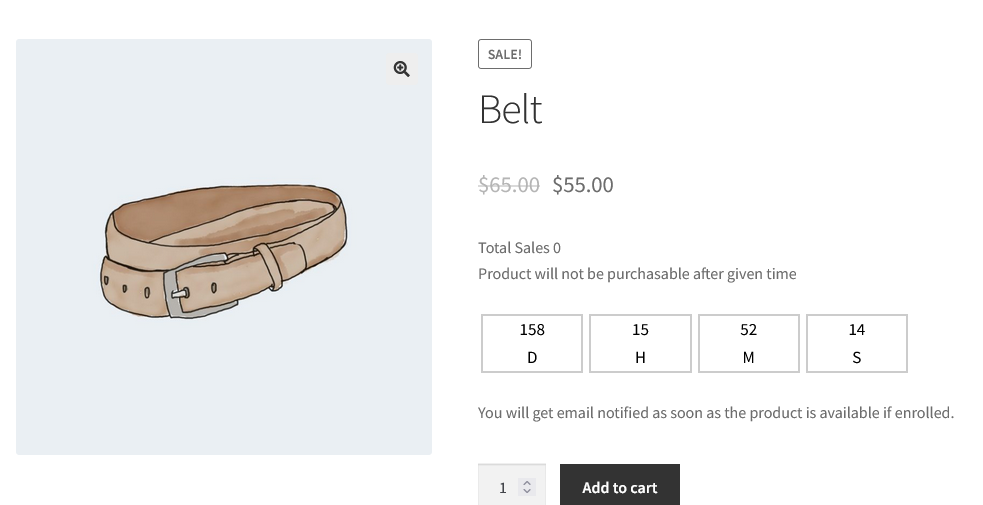
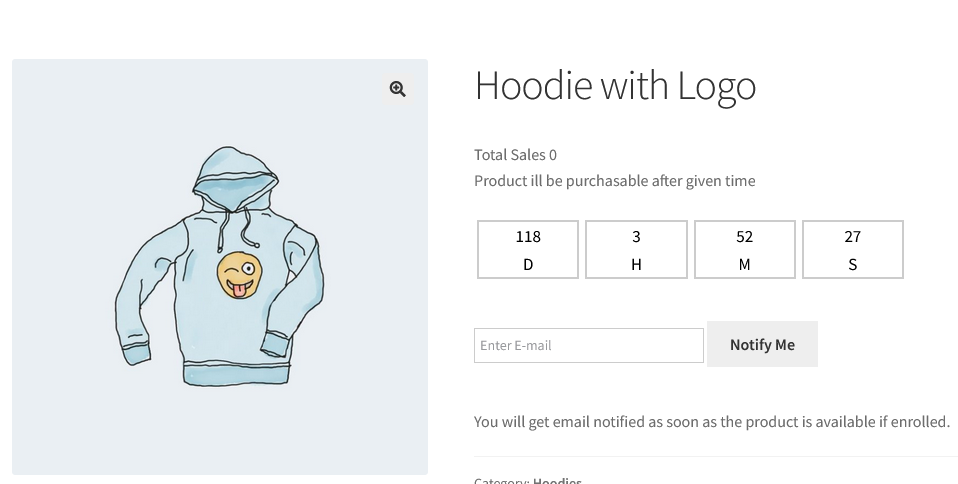
Product Status: There will be two types of statuses when schedule the product. Product not purchasable, when the product is scheduled and this option is selected so the product will no be purchasable until the timer finish. Purchasable, when the product is scheduled and this option is selected so the product will be purchasable until the timer finish.
Text Before Scheduler Timer: Displays the text above the timer.
Text After Scheduler Timer: Displays the text below the timer.
Scheduler Start Date: Set starting date of the schedule.
Scheduler Start Time: Set starting time of the schedule.
Scheduler End Date: Set end date of the schedule.
Scheduler End Time: Set end time of the schedule.
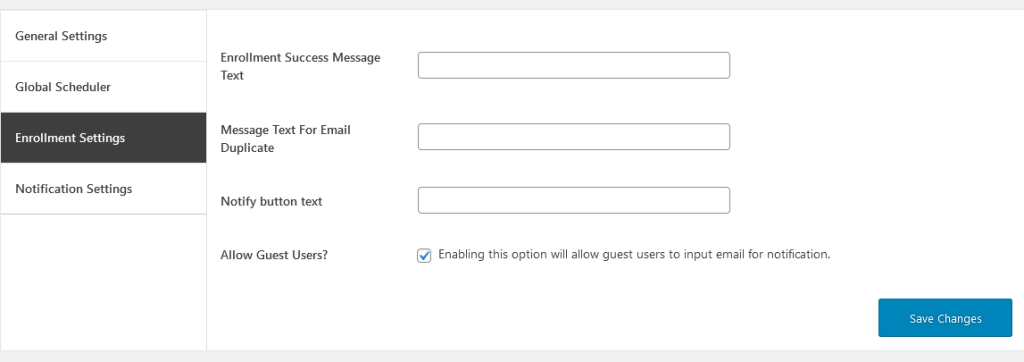
Allow Enrollment?: Enabling this option will allow users to input email for notification. Use this option if product is not purchasable.
Hide If Scheduled: Enabling this option will hide the product if scheduled. Use this option if product is not purchasable.

Availability scheduler also supports the functionality of scheduling the variations of the variable products. All the setting are same as simple products.
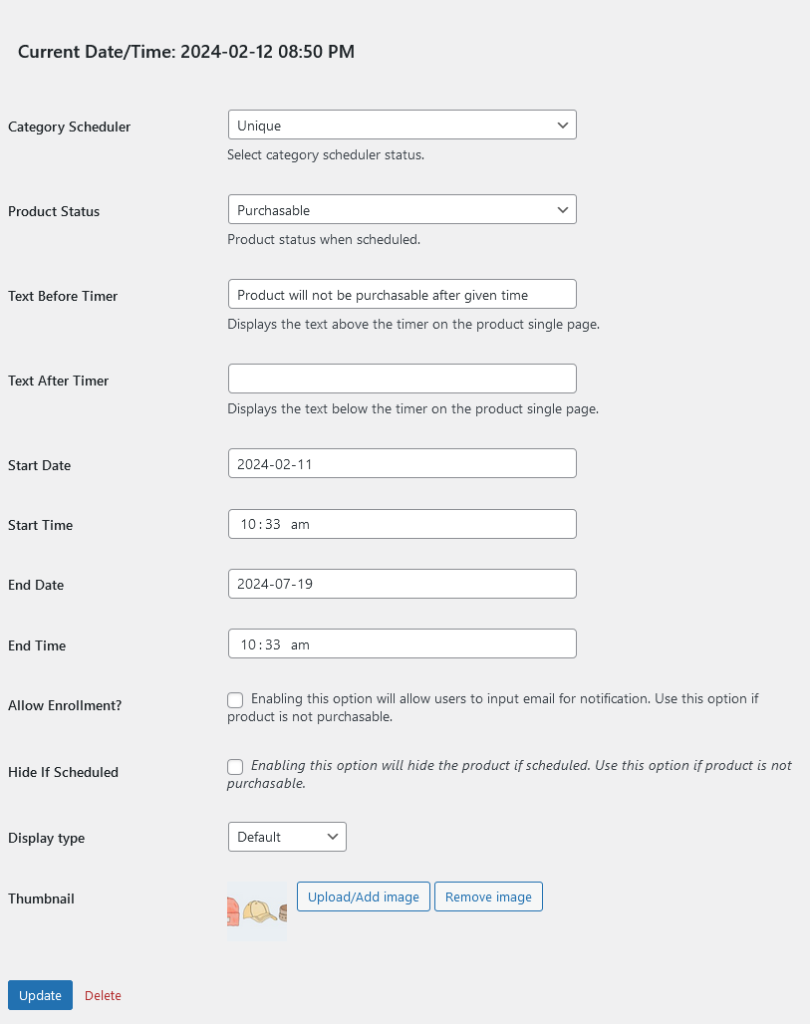
Our plugin allow the store managers to create the scheduling rule sets at the category level also to ease their job. If the product level settings is not configured, when our plugin consider it as ‘inherit’ by default and it will look for the category level rules.
Here at the category level the options are still the same as the product level but with a single difference. When inherit selected at the category level also, it will ignore its rule sets and will look for the global rule sets.
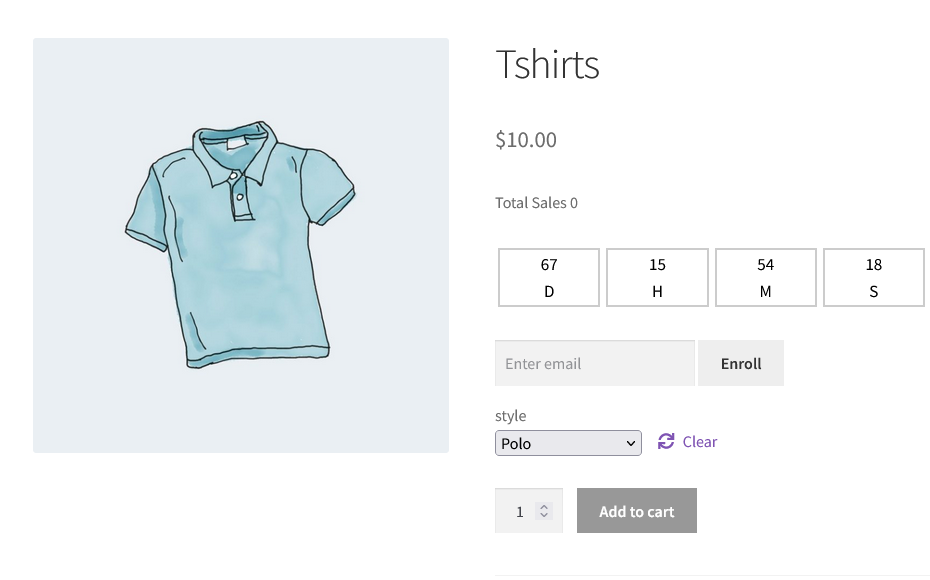
When the variation selected the timer will appear if the specific variation is scheduled. Also enroll email field will appear to collect emails.
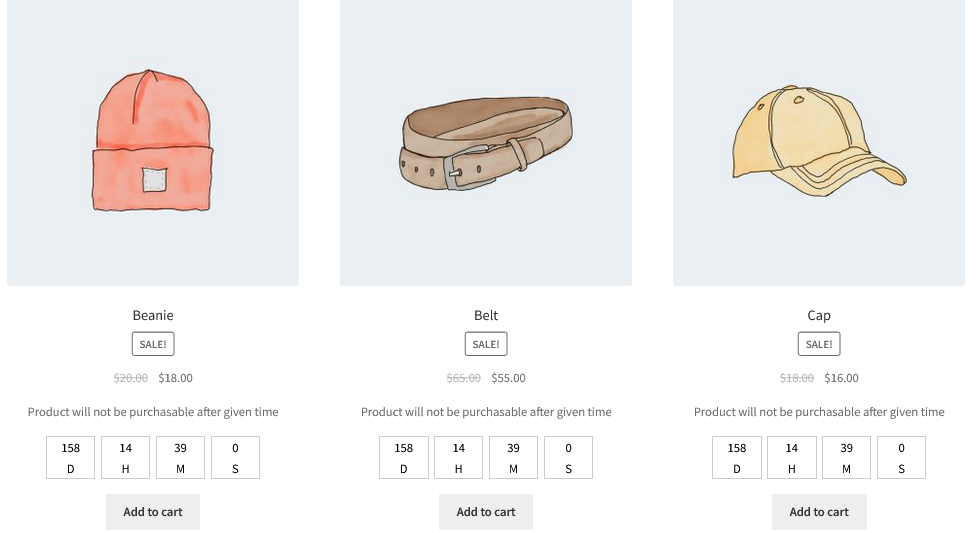
Product is scheduled and its available for specific piece of time. That product will not be available when the time up.
Smart Bulk Variations is used to display the variations of the variable product in 4 different styles to easily add the variations to cart in a bulk and do not need to choose the variations one by on.
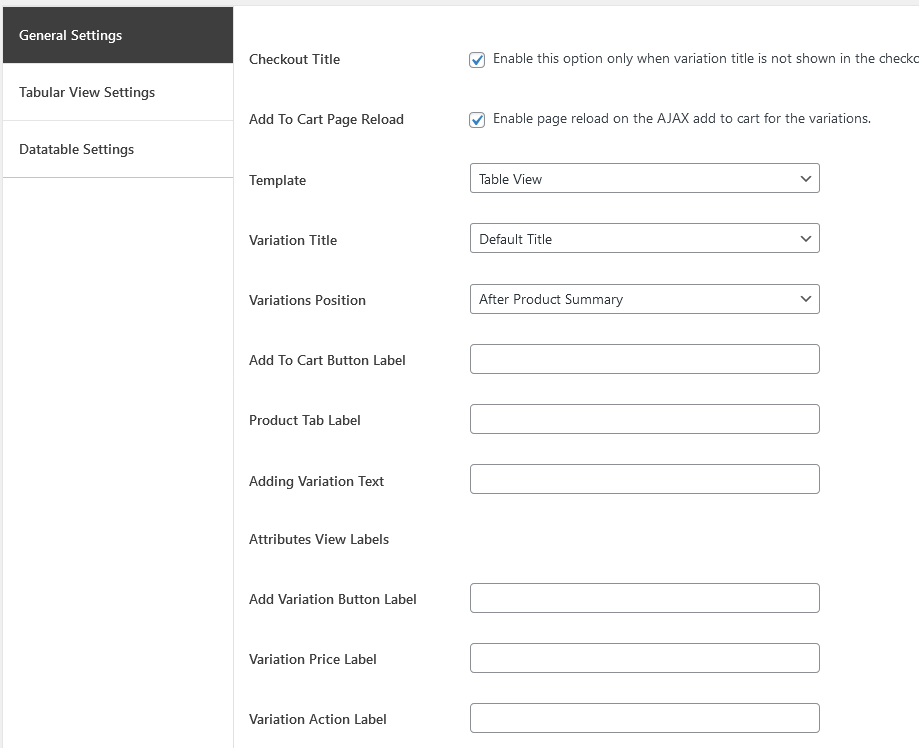
If the variations template is set to the tabular view then below fields are need to be configured.

Below are some of the option to customize the table functionality.
Below are the options to modify the data table labels.

Enable:
There are 3 ways how to setup the pricing rule sets for the products.
Global Settings: Choose global settings option to detect the variations rule set of the general settings for the current editing product.
Benefits of this option is you have to setup the rule sets at the general settings level as mentioned above and it will be applied on all the variable products.
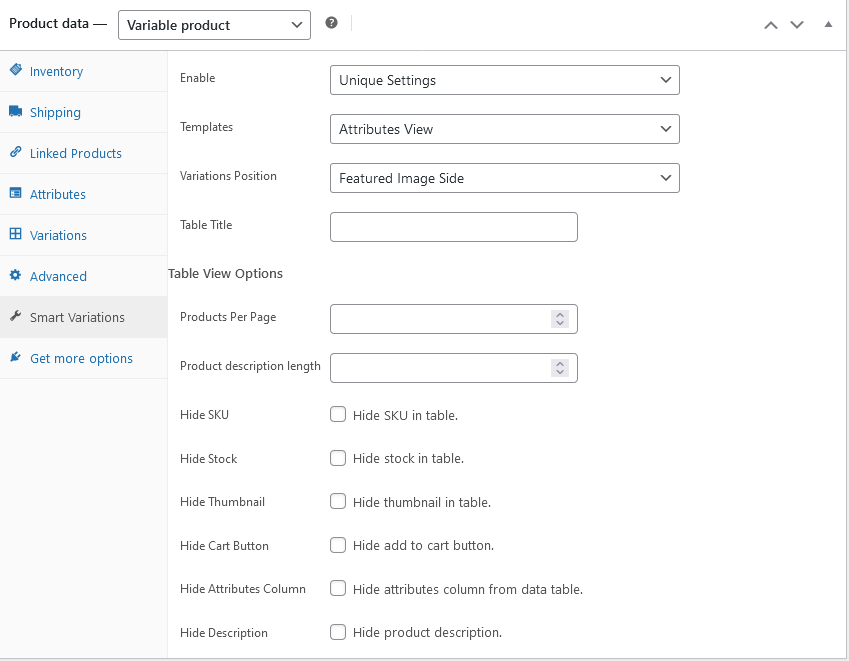
Unique: This option will allow you to set up the variations rule set at the product level as the options are listed below.
Disable: By choosing this option the Smart Bulk Variations functionality will be disabled for that specific product.
Template: There are 4 types of views to show variations.
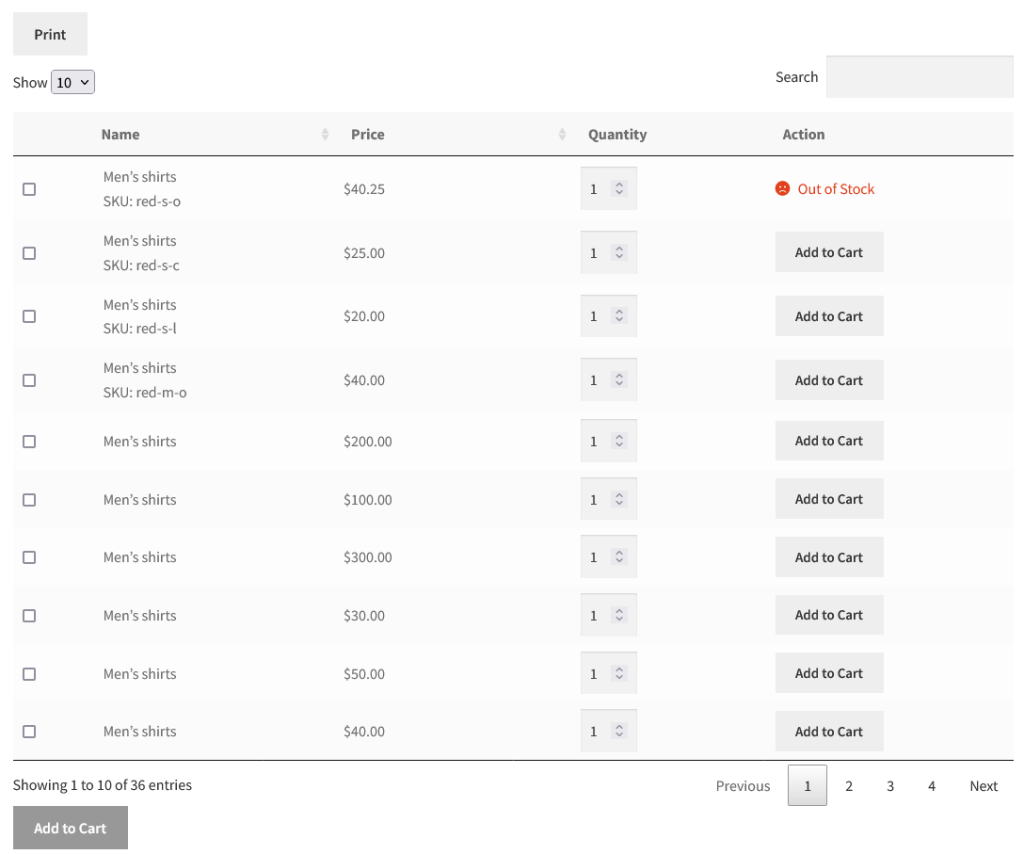
Table View: To show variations in the functional table. It contains search sorting and pagination.
Attributes View: It will display the attributes of the variations in dropdown, so the customers will choose variations and add them. After adding multiple variations, customers will add them to cart in a bulk.
Grid View: In this view all the variations will be displayed in a grid.
List view: This option will display all the variation in a list.
Table Title: Add table title here.
Products Per Page: Add the number to show products per page.
Description Length: Add limit to the product description in the table.
Hide Information: Below are some of the options used to hide product information in the tabular view.

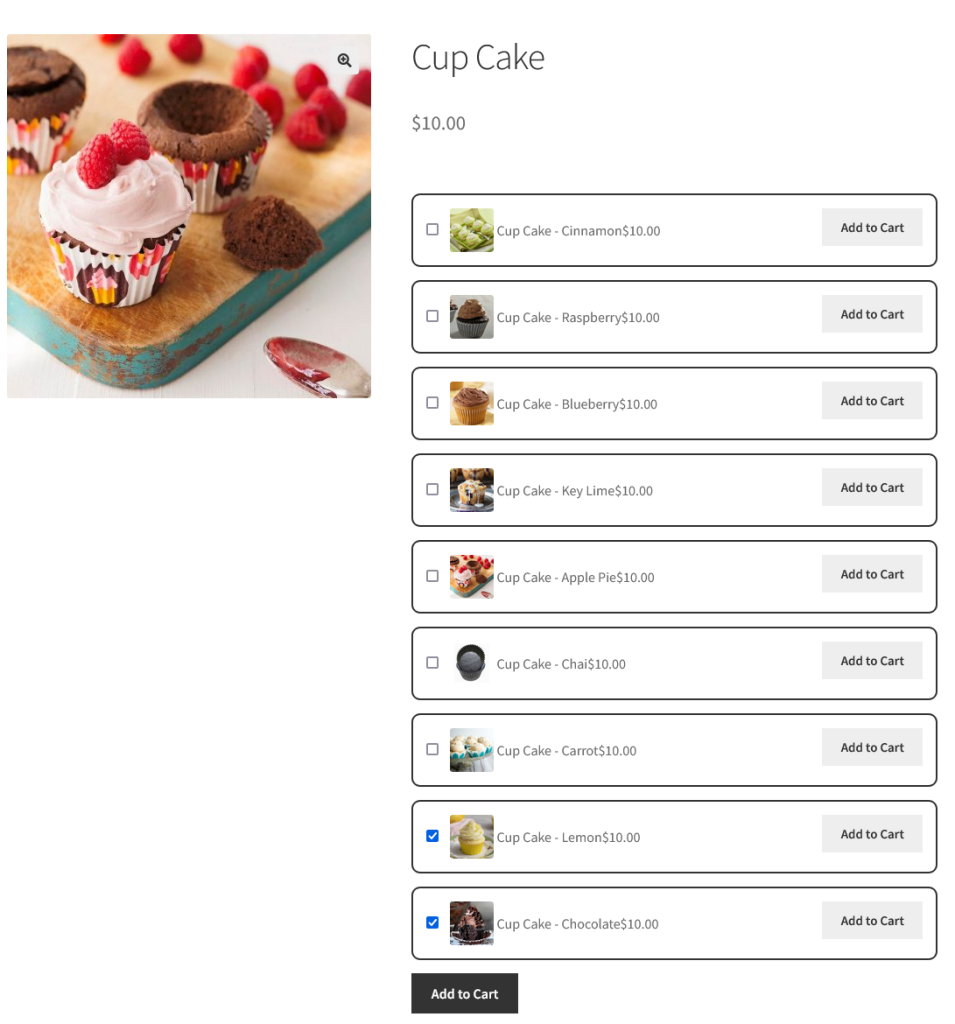


Bundle Builder for WooCommerce allow you to create multiple bundle products with discount. Bundle Builder allow you to sell the bundles in one or multi steps for comprehensive bundles. Our bundle builder allow different types of pricing, fancy layout and support product add-ons plugin.
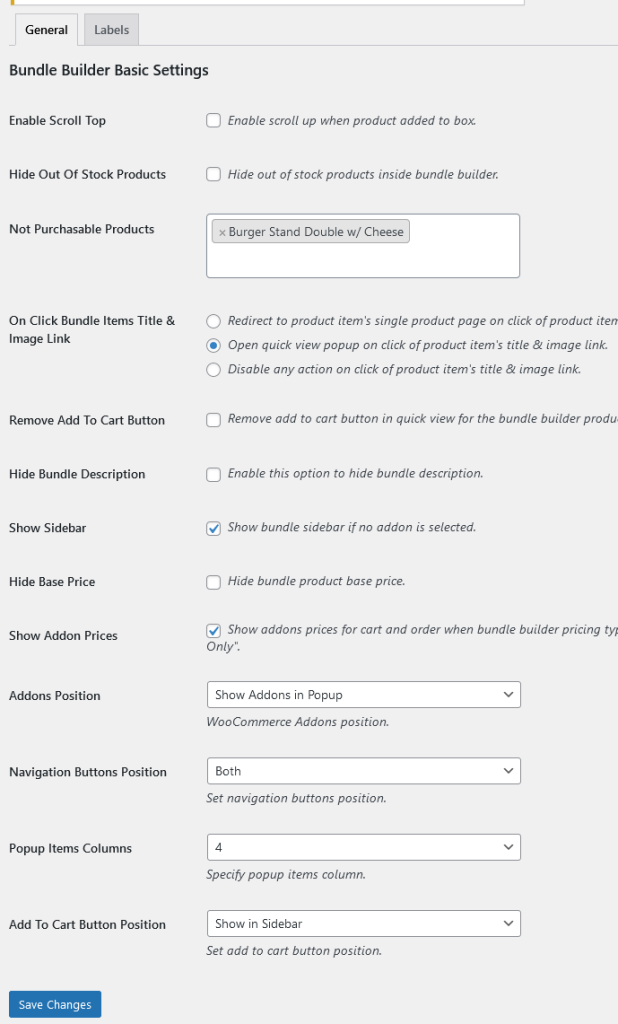
Enable Scroll Top: Enable scroll up when product added to box.
Hide Out Of Stock Products: Hide out of stock products inside bundle builder.
Not Purchasable Products: If you want to sell the product bundles and do not want to sell simple products individually, this option is used. Choose the product to make them not purchasable for the customers.
On Click Bundle Items Title & Image Link:
– Redirect to product item’s single product page on click of product item’s title & image link.
– Open quick view popup on click of product item’s title & image link.
– Disable any action on click of product item’s title & image link.
Remove Add To Cart Button: Remove add to cart button in quick view for the bundle builder product items.
Hide Bundle Description: Enable this option to hide bundle description.
Show Sidebar: Show bundle sidebar if no add-on is selected.
Hide Base Price: Hide bundle product base price.
Show Add-on Prices: Show add-ons prices for cart and order when bundle builder pricing type set to “Product Add-on Price + Regular Price” and “Product Add-ons Price Only”.
Add-ons Position: There are two positions to display add-ons. 1. Show add-ons in popup, 2. Show add-ons in popup.
Navigation Buttons Position: Navigation buttons are used to navigate between the bundle builder steps if there are multi step bundle. This option allow to display the navigation button below the items, above the items or display in both positions.
Popup Items Columns: Specify popup items column.
Add To Cart Button Position: Display add to cart button of the bundle either in sidebar or in popup.
All strings of our plugin are localized and dynamic. Below are the option to edit the default labels of bundle builder.
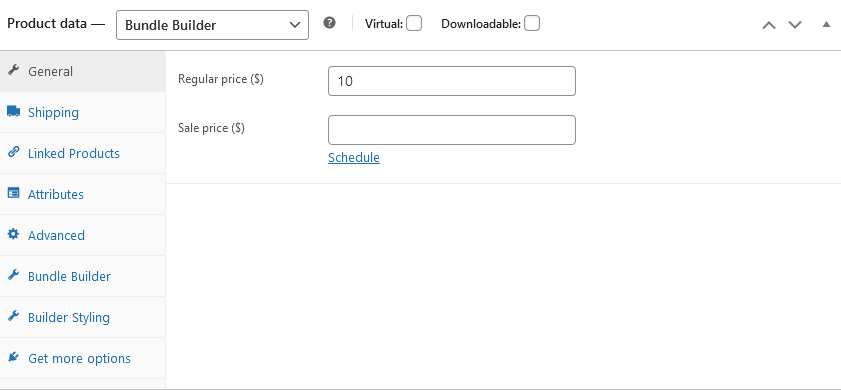
Product price is mandatory for the bundle builder and WooCommerce does not allow to add to cart the items if they have no price added. Also choose the product type “Bundle Builder” from the dropdown to make the product bundle.
Pricing Type: There are three types of pricing for the bundle.
1. Product add-ons price + regular price: This option will add add-ons prices and regular price to form the final price of the bundle.
2. Fixed Regular Price: This option will ignore the add-ons prices and get the bundle regular price only.
3. Product add-ons price only: This option will ignore the bundle regular price and get the add-ons price as a final price of the bundle.
Products Layout Columns: Choose the number of columns to display the products in the bundle.
Bundle Layout: Set the position of the sidebar of the bundle which contain the pricing information, message textarea etc.
Enable Product Price: Enable this option to display the add-ons products in the bundle.
Enable Cart Message: Enable his option to display the message field on sidebar or popup.
Restrict Next Step: Restrict to go to the next page when specified number of add-ons are not selected for the current step.
Hide Items Quantity: Hide the quantity field for the add-ons.
Bundle Discount: Bundle builder allow to add discount for the bundle also. It offer 2 types of discount Fixed and Percentage.
Bundle Discount: Add discount value.
Image: Add image to display it on the top of the bundle.
Popup Image: Add image in popup.
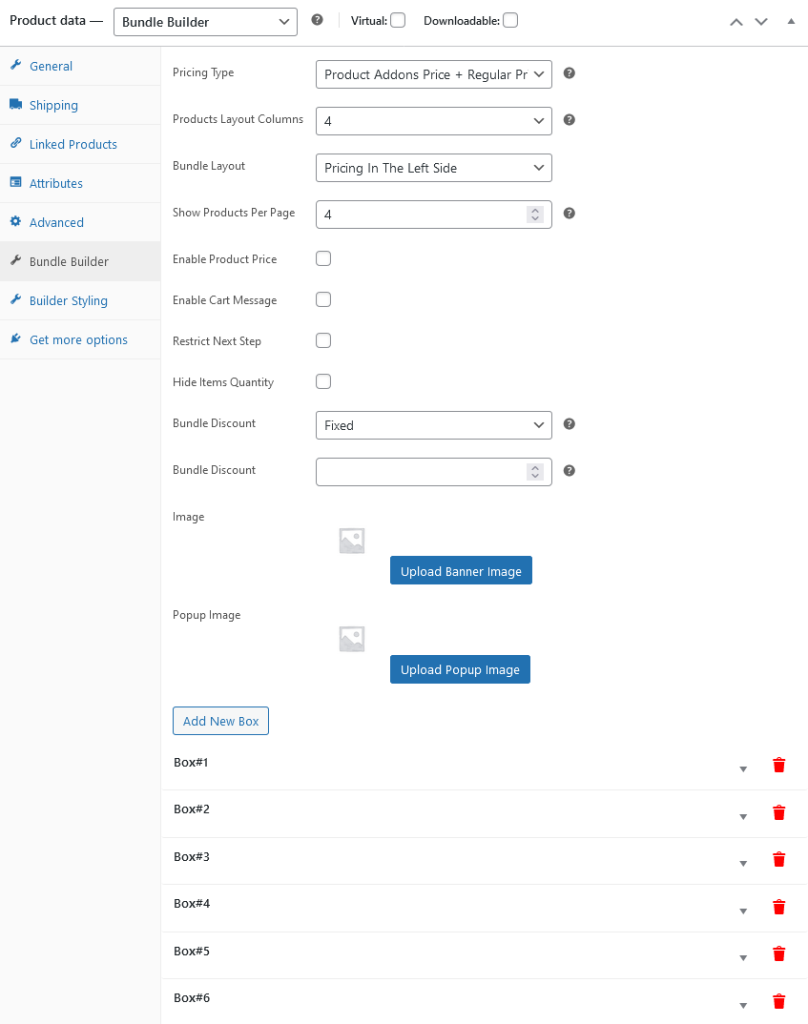
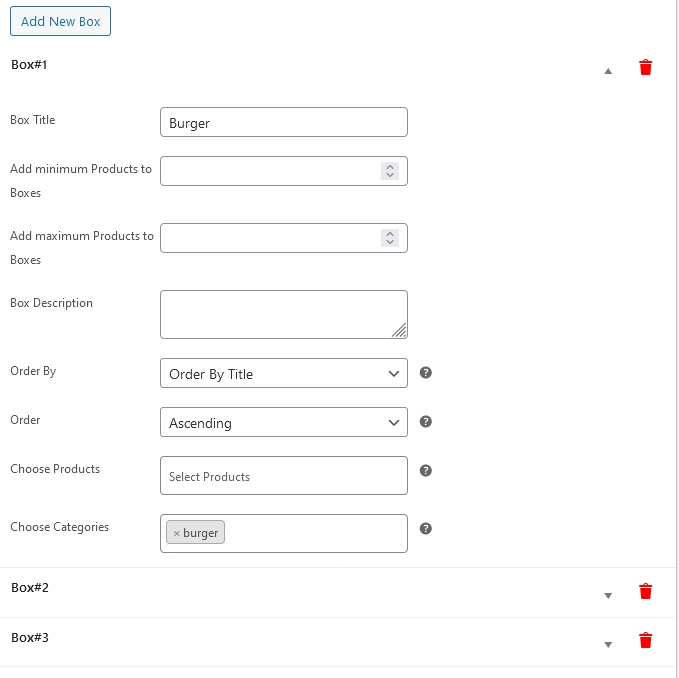
There is a button named “Add New Box” it create multiple steps for the bundle. Each step contain their own specific options.
Box Title: Add box title.
Add minimum Products to Boxes: Specify the number to restrict the step on front end to add minimum number of add-ons.
Add maximum Products to Boxes: Specify the number to restrict the step on front end to add maximum number of add-ons.
Box Description: Add box description. It will be displayed above the add-ons.
Order By: Sort the add-ons by Title, Price or Best selling.
Sorting Order: Choose sorting order either ascending or descending order.
Choose Products: Choose add-ons for that specific step.
Choose Categories: Choose categories to display their products as an add-ons for that specific step.
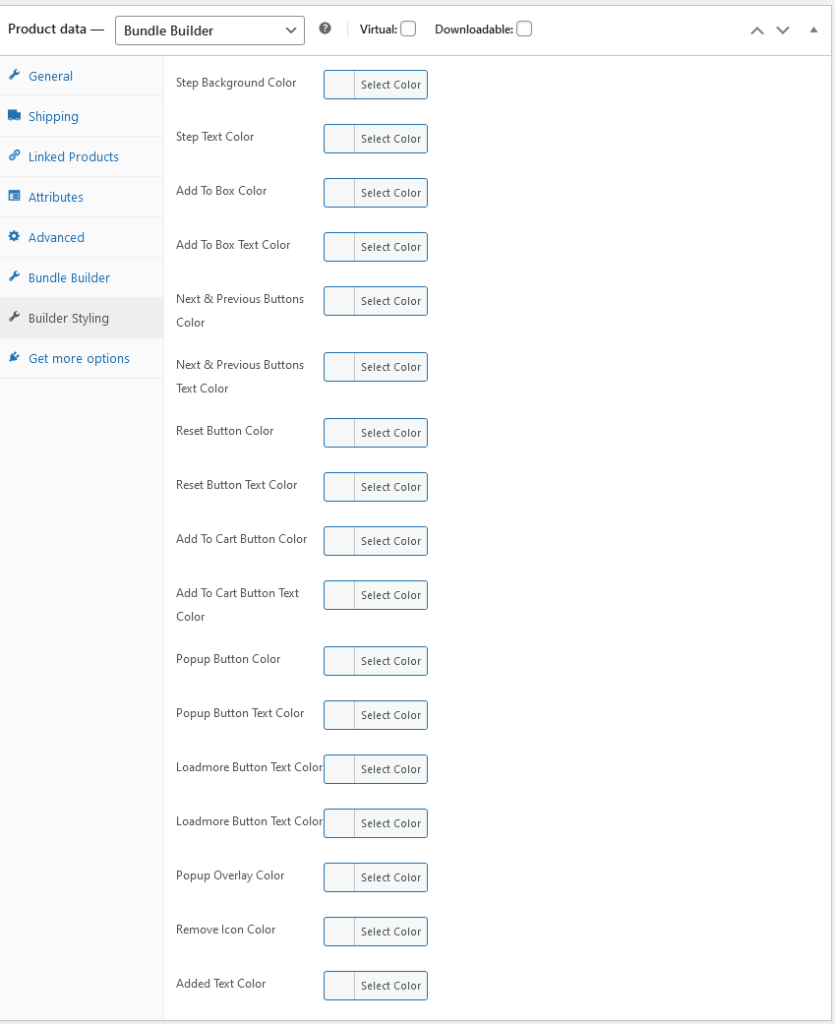
Bundle builder comes with several color options to style the bundles. Each bundle has its own styling options.


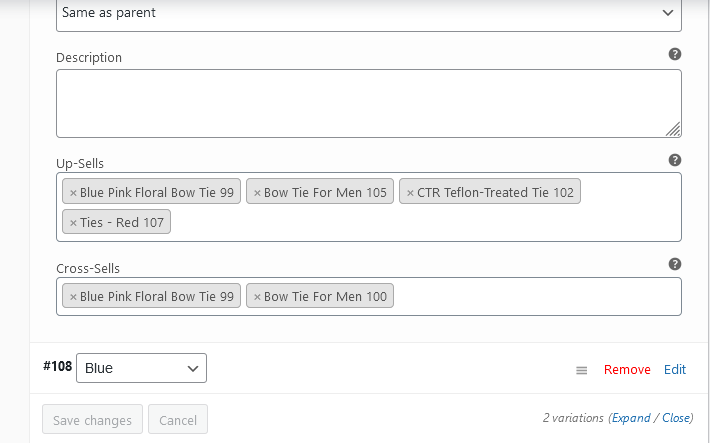
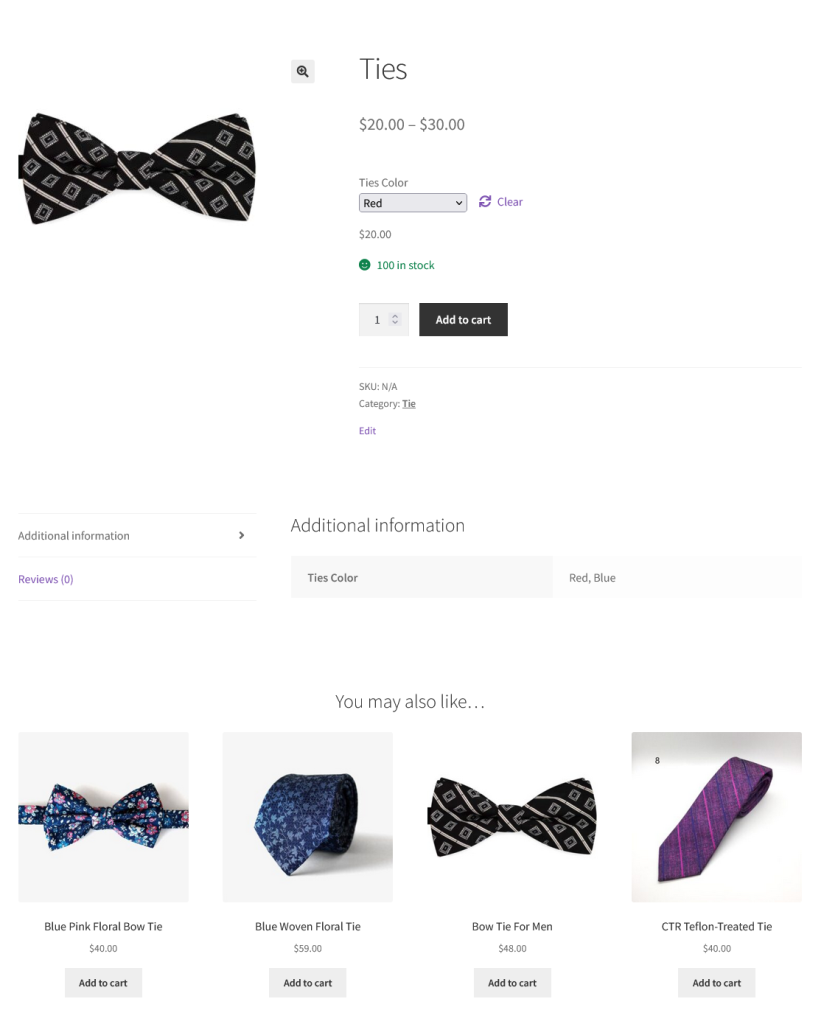
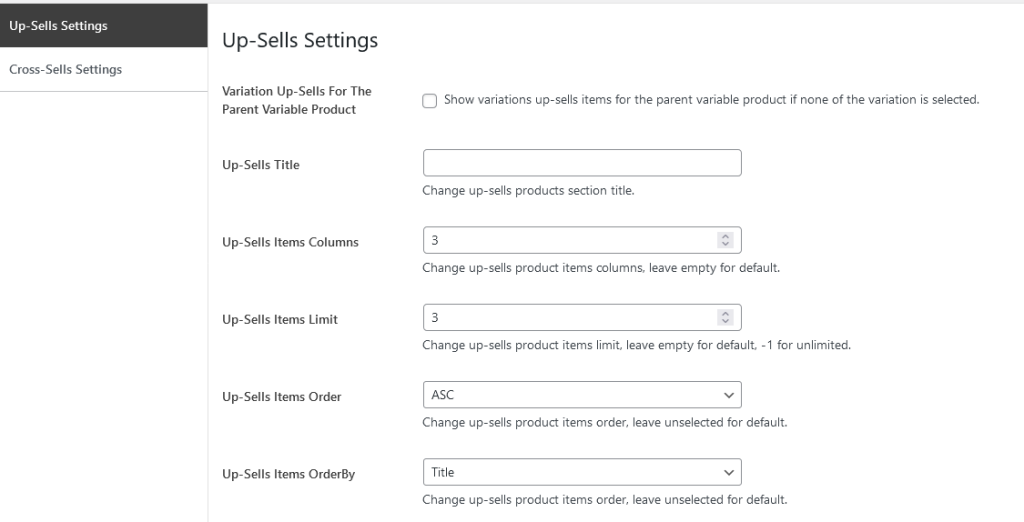
WooCommerce allow to add up-sells and cross-sells for the simple products but for the variations of the variable product there is no such options. Up-Sells and Cross-Sells For WooCommerce overcomes the limitation. Up-Sells and Cross-Sells For WooCommerce will allow you to add up-sells and cross-sells for the variations also;
Variation Up-Sells For The Parent Variable Product: Show variations up-sells items for the parent variable product if none of the variation is selected.
Up-Sells Title: Add up-sells title.
Up-Sells Items Columns: Change up-sells product items columns, leave empty for default.
Up-Sells Items Limit: Change up-sells product items limit, leave empty for default, -1 for unlimited.
Up-Sells Items Order: Change up-sells product items order, leave unselected for default.
Up-Sells Items Order By: Change up-sells product items order, leave unselected for default.
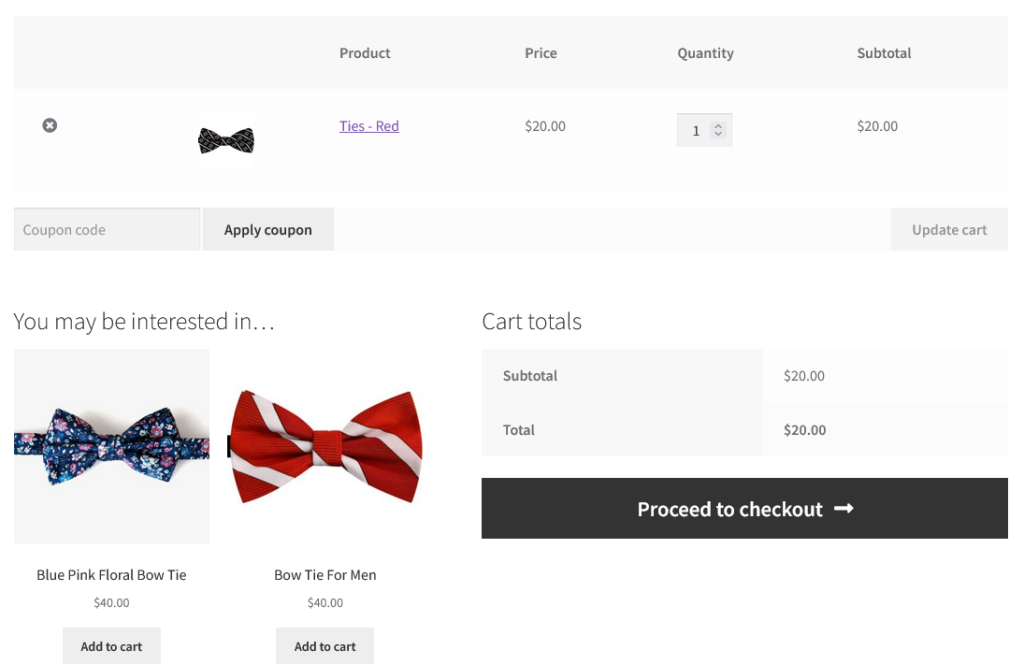
Cross-Sells Title: Change cross-sells products section title.
Cross-Sells Items Columns: Change cross-sells product items columns, leave empty for default.
Cross-Sells Items Limit: Change cross-sells product items limit, leave empty for default, -1 for unlimited.
Cross-Sells Items Order: Change cross-sells product items order, leave unselected for default.
Cross-Sells Items Order By: Change cross-sells product items order, leave unselected for default.